
Offering sales and promotions is a great way to attract customers and increase sales in your WooCommerce store. Whether you’re running a seasonal sale, a special promotion, or just looking to clear out inventory, WooCommerce makes it easy to put products on sale. In this guide, we’ll walk you through the process of putting a product on sale in WooCommerce, step-by-step.
Why Put a Product on Sale?
Sales and promotions serve several strategic purposes. They can boost sales by driving more traffic to your store and encouraging customers to make a purchase. Sales are also an effective way to move excess or seasonal inventory. Special promotions can attract new customers who might not have considered buying from you otherwise. Additionally, offering discounts to existing customers can enhance their loyalty and encourage repeat business.
Step 1: Log into Your WordPress Dashboard
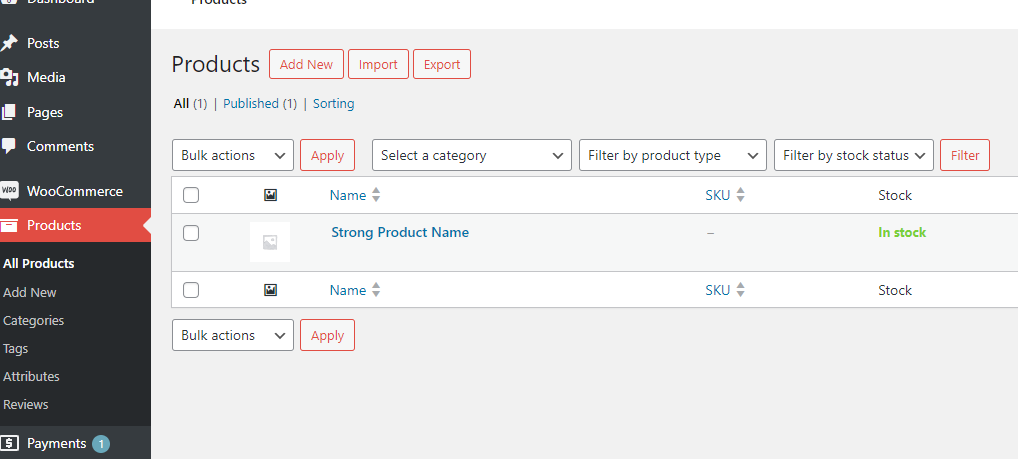
Begin by logging into your WordPress admin area. Once logged in, navigate to WooCommerce > Products from the sidebar menu. This action will take you to a list of all your products.
Step 2: Select the Product You Want to Put on Sale
Locate the product you wish to discount. You can use the search bar or filter options to find it more quickly. Once you’ve found the product, click on its name or the ‘Edit’ button to open the product editing screen.
Step 3: Set the Sale Price
In the product editing screen, scroll down to the Product Data section, where you’ll manage pricing and inventory for your product. Click on the ‘General’ tab within the Product Data section. Here, you’ll find fields for Regular Price and Sale Price. Enter the sale price in the appropriate field.
If you want the sale to be available only for a specific period, you can schedule it by clicking on the ‘Schedule’ link next to the Sale Price field. A date picker will appear, allowing you to set a start and end date for the sale. This feature is useful for limited-time promotions or seasonal sales. After setting the sale price (and scheduling, if applicable), click the ‘Update’ button to save your changes.

Step 4: Verify the Sale Price on Your Product Page
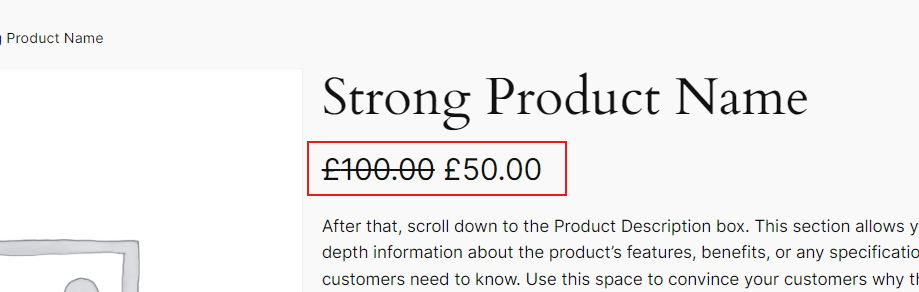
After saving, visit your store’s front end and navigate to the product page to ensure the sale price is displayed correctly. The regular price should be shown with a strikethrough, and the sale price should be prominently displayed. Check that the sale price is applied correctly in the cart and checkout pages by adding the product to your cart and verifying that the discount is reflected in the final price.
Additional Tips for Running Effective Sales
To make your sales more effective, use banners, pop-ups, or special sections on your homepage to highlight ongoing sales and promotions. Promote your sale on social media to reach a broader audience and drive more traffic to your store. Notify your email subscribers about the sale by highlighting the discount and any special offers to encourage visits to your store. Additionally, monitor the performance of your sale through WooCommerce reports and analytics. Reviewing metrics like sales volume and customer engagement can help you understand the impact of your promotion.
Troubleshooting Common Issues
If the sale price is not displaying correctly, ensure you’ve saved your changes and cleared any cache. Caching plugins or browser caches can sometimes cause display issues. Double-check the sale price and regular price fields to ensure the discount is applied correctly, and make sure no conflicting plugins are affecting the pricing.
Conclusion
Putting a product on sale in WooCommerce is a straightforward process that can significantly benefit your business. By following these steps, you can easily set up discounts and promotions to attract customers, boost sales, and manage your inventory effectively.
Remember to monitor your sale’s performance and adjust your strategy based on the results.