Yoast SEO is one of the most popular WordPress plugins, designed to help website owners optimise their content for search engines. Whether you’re looking to improve on-page SEO or enhance the readability of your articles, Yoast SEO provides essential tools for beginners and professionals alike. If you’re ready to get started with this plugin, here’s a simple guide on how to install and activate Yoast SEO on your WordPress website.
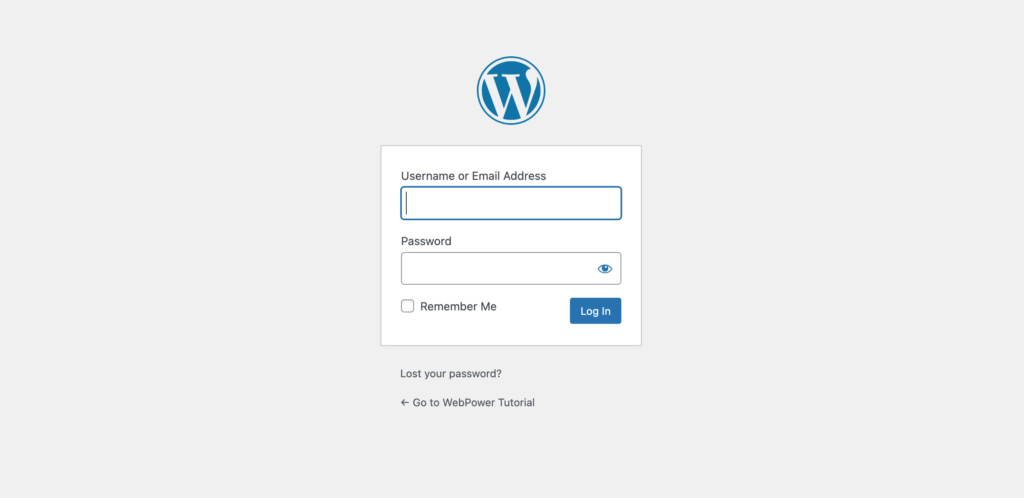
Step 1: Log into Your WordPress Dashboard
To begin, you need to log into your WordPress dashboard. Simply type in your website’s URL followed by “/wp-admin” in your browser’s address bar. Enter your username and password to access your dashboard. Once you’re in, you’ll be able to access all the features needed to manage your site.
Step 2: Navigate to Plugins
From your WordPress dashboard, go to the left-hand menu and click on “Plugins,” then select “Add New.” This will take you to the WordPress plugin repository, where you can search for and install any plugin.
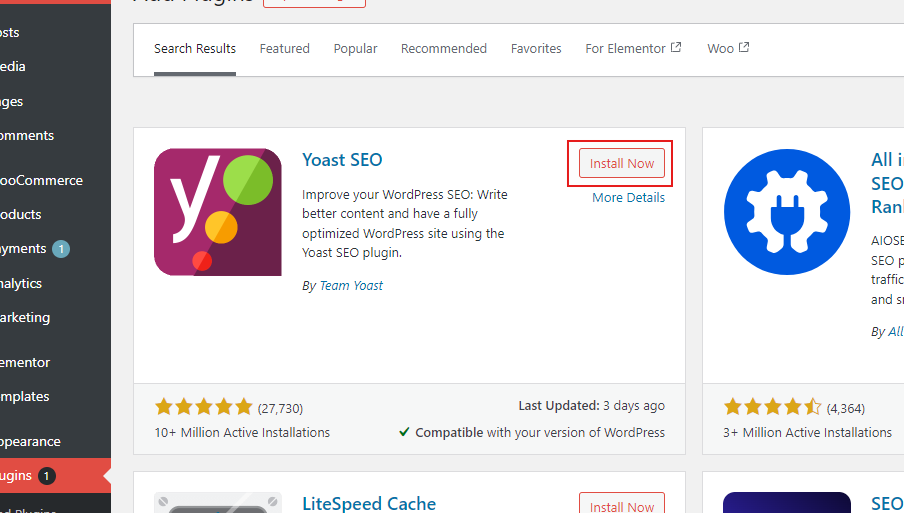
Step 3: Search for Yoast SEO
In the plugin search bar, type “Yoast SEO” and press enter. The Yoast SEO plugin should be the first result. You’ll recognise it by its distinctive logo and the “SEO” label in its name. Once you’ve found it, click the “Install Now” button next to the plugin.
Step 4: Activate the Plugin
After the installation is complete, you’ll notice that the “Install Now” button changes to “Activate.” Simply click on “Activate” to enable Yoast SEO on your website. Once activated, Yoast SEO will automatically appear in your WordPress dashboard, under the “SEO” tab in the left-hand menu.
Step 5: Configure the Yoast SEO Plugin
Now that Yoast SEO is installed and activated, it’s time to configure it for your website. Click on the “SEO” tab in your WordPress dashboard, and select the “General” option. This will bring up the Yoast configuration wizard. The wizard will guide you through the basic settings, allowing you to set up your website for SEO, such as identifying whether your site is a blog, eCommerce store, or other type of website.
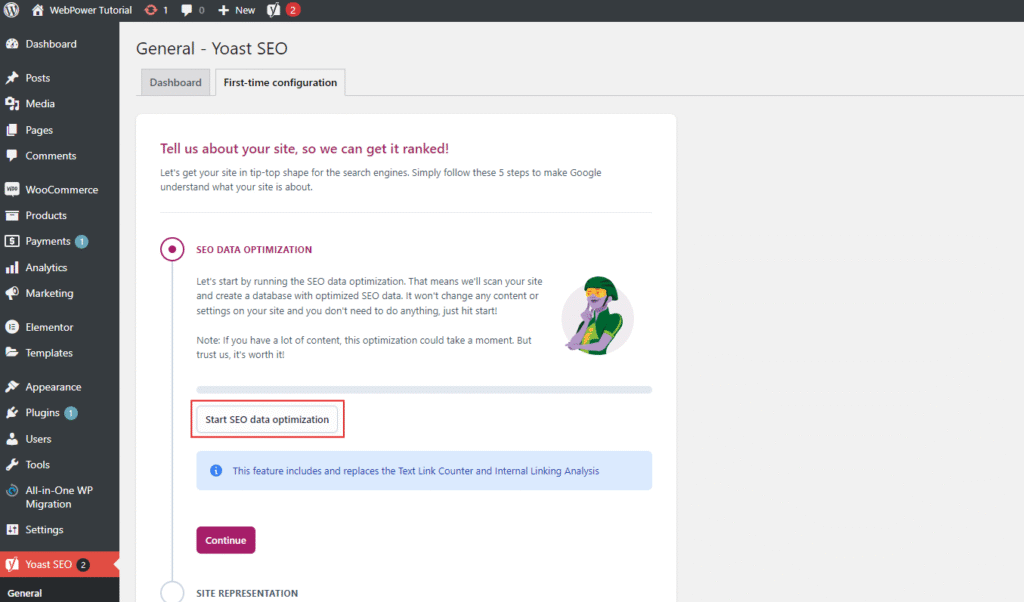
The configuration wizard is incredibly user-friendly and will walk you through key steps like setting up search engine visibility, adding social media accounts, and selecting the type of site structure you use. Take your time to follow the wizard to ensure that everything is set up correctly for your website.
Step 6: Optimising Your Content with Yoast
Once Yoast SEO is active, you’ll notice that when you create or edit posts and pages, a new Yoast SEO section appears below the editor. This area provides helpful tools, such as an SEO analysis, a readability score, and options to add meta titles and descriptions. These features allow you to optimise each piece of content for search engines easily. Pay attention to the recommendations, and adjust your content to improve both SEO and readability scores.
By following these steps, you can install and activate Yoast SEO on your WordPress website with ease. Yoast SEO is a powerful tool that will help you optimise your content, improve your search engine rankings, and ultimately attract more visitors to your site. Take advantage of the plugin’s features, and you’ll be on your way to better SEO performance.