WooCommerce is a powerful and flexible plugin for WordPress that turns your website into a fully functional online store. Whether you’re setting up a new e-commerce site or adding an online shopping feature to your existing website, WooCommerce offers a user-friendly way to manage products, orders, and customers. In this guide, we’ll walk you through the process of installing and activating WooCommerce on your WordPress site.
Why Choose WooCommerce?
WooCommerce is the most popular e-commerce plugin for WordPress, and it’s trusted by millions of online retailers. Here’s why it’s a top choice:
- Ease of Use: WooCommerce integrates seamlessly with WordPress, making it easy to manage your store alongside your website.
- Customisation: With a wide range of themes and extensions, you can tailor your store to meet your specific needs.
- Scalability: From small businesses to large enterprises, WooCommerce scales with your business as it grows.
- Community Support: As a widely used plugin, WooCommerce benefits from a large community of developers and users, ensuring plenty of support and resources.
Step 1: Prepare Your WordPress Site
Before installing WooCommerce, ensure your WordPress site is ready for e-commerce:
- Choose a Reliable Hosting Provider: Make sure you’re using a reputable hosting provider with good performance and support for WordPress. At WebPower, we offer hosting solutions that are optimised for WordPress and WooCommerce.
- Update WordPress: Ensure your WordPress installation is up to date. Go to Dashboard > Updates and check for any available updates.
- Backup Your Site: It’s always a good idea to back up your site before installing new plugins. This ensures you can restore your site if anything goes wrong.
Step 2: Install WooCommerce
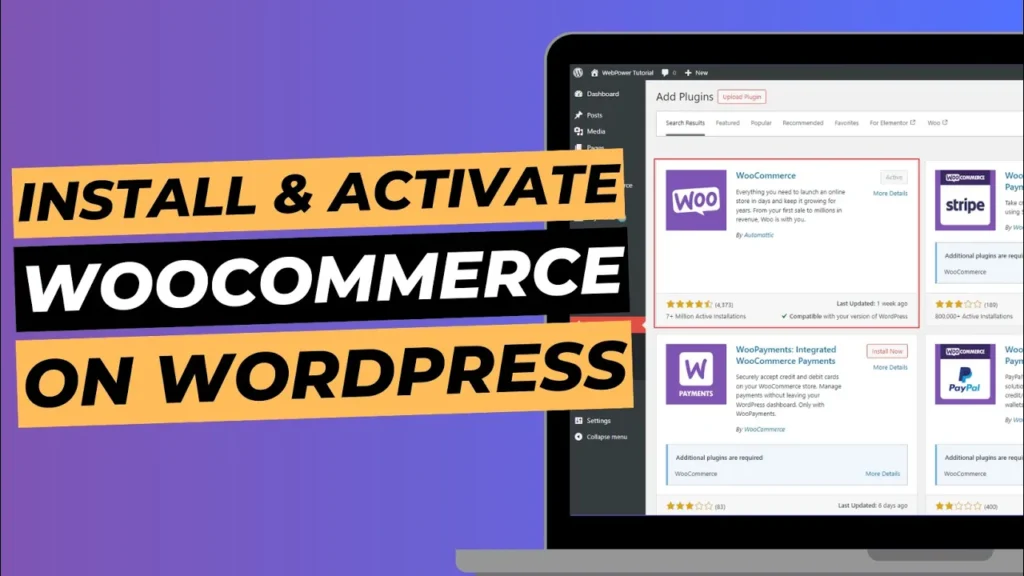
- Log into Your WordPress Dashboard: Start by logging into your WordPress admin area.
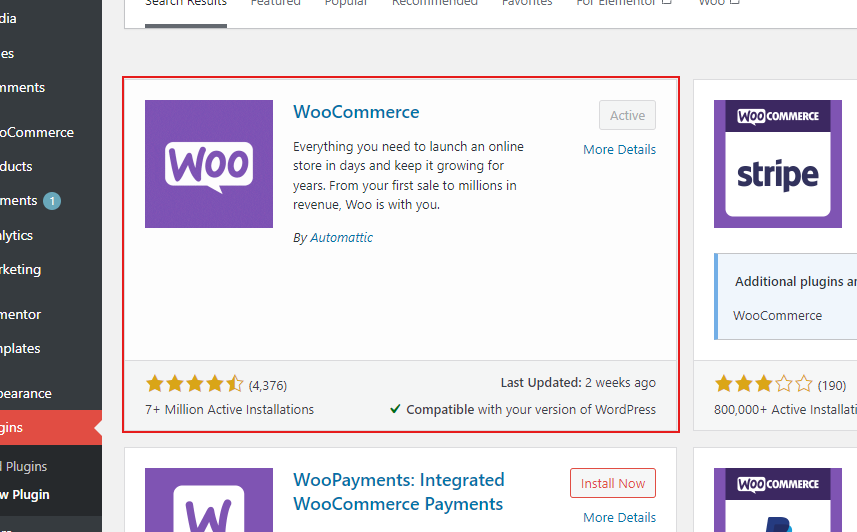
- Navigate to Plugins: Go to Plugins > Add New from the sidebar menu.
- Search for WooCommerce: In the search bar, type “WooCommerce”. The plugin should appear as the first result.
- Install the Plugin: Click the Install Now button next to WooCommerce. WordPress will download and install the plugin for you.
- Activate the Plugin: Once installed, click the Activate button. This will enable WooCommerce on your site and add a new menu item in your WordPress dashboard.
Step 3: Configure WooCommerce
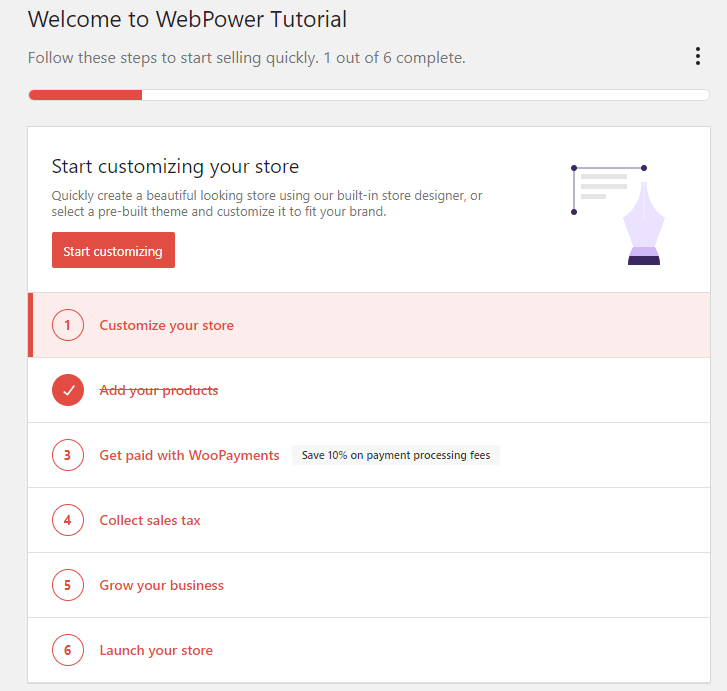
After activating WooCommerce, you’ll be guided through an initial setup wizard to configure your store settings. Here’s how to get started:
- Welcome Screen: WooCommerce will present a welcome screen with an option to start the setup wizard. Click Run the Setup Wizard to begin.
- Store Setup: Enter your store details, including location, currency, and the types of products you’ll be selling. Follow the prompts to configure your store’s general settings.
- Payment Setup: Choose your preferred payment methods. WooCommerce supports various payment gateways like PayPal, Stripe, and bank transfers. Configure your payment options according to your business needs.
- Shipping Setup: Set up your shipping methods and rates. You can define shipping zones, methods, and costs based on your delivery requirements.
- Additional Options: WooCommerce will also prompt you to set up other essential options, such as tax settings and customer accounts. Configure these options based on your store’s requirements.
- Activate Recommended Plugins: WooCommerce may suggest additional plugins that enhance your store’s functionality. You can choose to install these plugins as needed.
- Complete the Setup: Once you’ve gone through all the setup steps, click Continue to finish the wizard. You’ll be directed to your WooCommerce dashboard, where you can start adding products and managing your store.
Step 4: Customise Your WooCommerce Store
- Choose a Theme: Select a WooCommerce-compatible theme to give your store a professional look. You can browse themes from the WordPress theme repository or purchase premium themes from third-party providers.
- Add Products: Start adding products to your store by going to Products > Add New. Enter product details, such as title, description, price, and images.
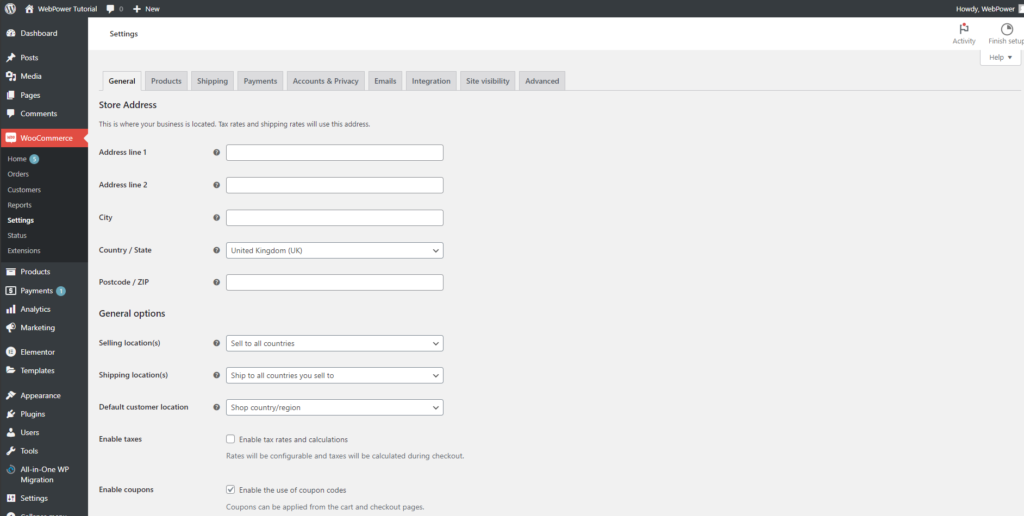
- Configure Settings: Fine-tune your WooCommerce settings by going to WooCommerce > Settings. Here, you can adjust various options, including product settings, payment gateways, shipping methods, and more.
- Install Extensions: Enhance your store’s functionality by installing WooCommerce extensions. These can add features such as advanced shipping options, additional payment gateways, or marketing tools.
Step 5: Test Your Store
- Place Test Orders: Before launching your store, place a few test orders to ensure everything is working correctly. Verify that payments are processed, orders are received, and shipping options are applied as expected.
- Check Mobile Responsiveness: Ensure your store looks and functions well on mobile devices. Many customers shop from their phones, so a mobile-friendly design is essential.
- Review and Launch: Once you’re satisfied with your store’s setup and functionality, review all settings and make any final adjustments. When ready, you can officially launch your store and start selling.
Conclusion
Installing and activating WooCommerce in WordPress is a straightforward process that sets the foundation for a successful online store. By following these steps, you can quickly set up your store, customise its appearance, and begin selling products to your customers.
Remember to continually review and update your store as your business grows, and make use of WooCommerce’s extensive features and extensions to enhance your e-commerce operations.