If you’re looking to create a consistent design across your WordPress website, using Elementor to set global fonts and colours is an excellent solution. By defining global styles, you ensure that your website’s text and colour schemes remain uniform, no matter how many new pages or elements you create. In this blog, we’ll guide you through the simple process of setting global fonts and colours in Elementor, helping you save time and maintain a professional look throughout your site.
Why Use Global Fonts and Colours?
Using global fonts and colours allows you to control the overall design of your website with ease. Instead of changing fonts and colours individually on every page or element, setting them globally means that any changes you make will automatically be applied to your entire site. This is especially useful for branding, as it ensures consistency in your design without the hassle of manual adjustments.
Step 1: Access the Elementor Editor
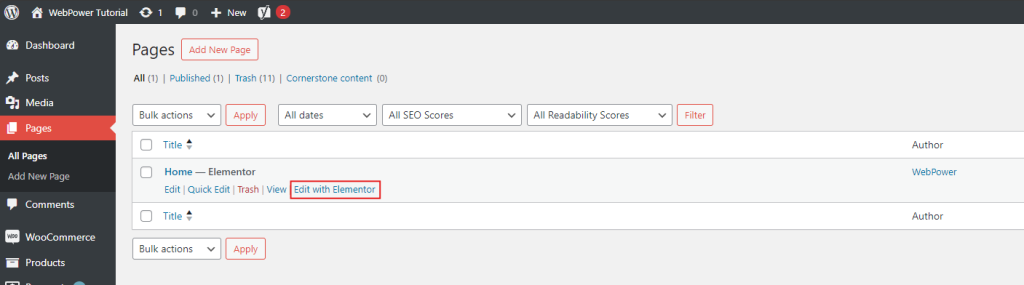
To begin, you’ll need to access the Elementor editor. From your WordPress dashboard, navigate to the page or template you wish to edit, and click “Edit with Elementor.” Once the Elementor editor loads, you’ll see the page editing interface, where you can make changes to your content and design elements.
Step 2: Open Global Settings
In the Elementor editor, locate the “Site Settings” option. You can find this by clicking the three horizontal lines in the top-left corner of the editor screen. This is where you can access all of your global design options, including fonts and colours.

Step 3: Set Global Colours
To set your global colours, select the “Global Colours” option within the Site Settings panel. Here, you will see default colour palettes, such as Primary, Secondary, Text, and Accent colours. You can customise each of these by clicking on the colour box and choosing your desired shade from the colour picker.
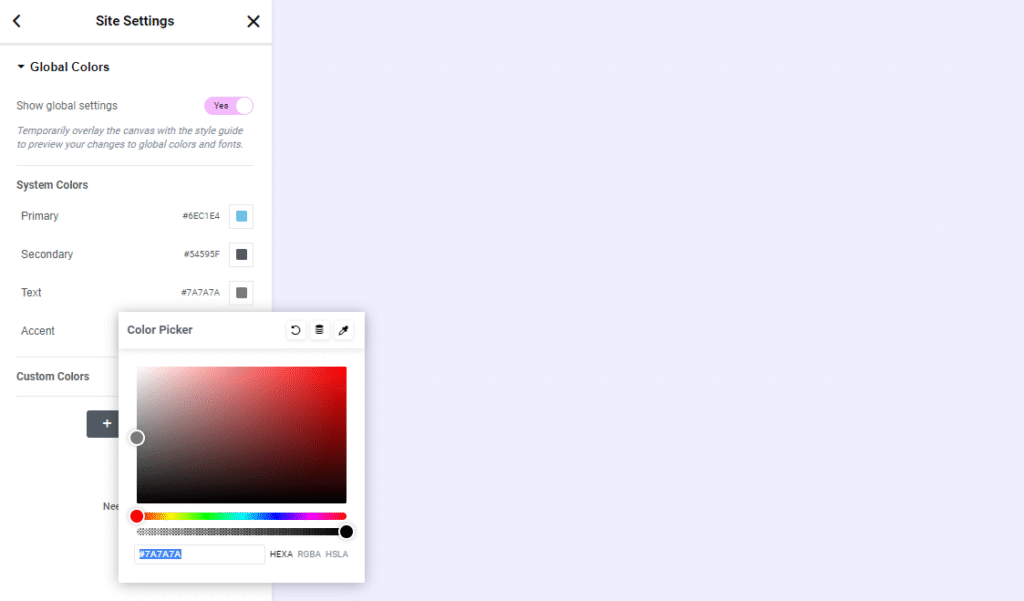
For example, if you have a specific brand colour that you’d like to apply to buttons, headings, or text across your website, simply adjust the Primary or Accent colours accordingly. Once these global colours are set, they will automatically be applied to any element that uses these colour settings, and any future changes made to the global palette will reflect across your entire site.
Step 4: Set Global Fonts
Next, navigate to the “Global Fonts” option in the Site Settings menu. Just like with colours, you’ll see various font categories, including Primary, Secondary, Text, and Accent fonts. Click on each option to select the font family, size, weight, and style for each category.

By setting global fonts, you ensure that every header, body text, or accent text on your website will use the same font family and styling. If you ever need to make changes to your font style later on, you can simply return to this menu, make your adjustments, and the changes will apply site-wide.
Step 5: Save Your Global Settings
After you’ve set your global fonts and colours, don’t forget to save your changes. Click the “Update” button at the bottom of the Site Settings panel to ensure your new global styles are applied to your website. Any existing elements that use the default font or colour settings will now update automatically, and any new pages or sections you create will inherit these global styles.

Step 6: Apply Global Styles to Individual Elements (Optional)
If you want to apply global fonts or colours to specific elements, Elementor makes this easy as well. When you’re editing a section, column, or widget, simply open the style settings for that element, and you’ll see the global colour and font options available. This allows you to easily select your global settings without manually choosing fonts or colours each time you create a new element.

Conclusion
Setting global fonts and colours in Elementor is a powerful way to streamline your website design process and maintain consistency across your WordPress site. Whether you’re building a personal blog or an eCommerce platform, using Elementor’s global styling tools ensures that your design remains cohesive and professional. By following the steps outlined above, you can easily define and update your global styles, giving your website a polished, unified appearance with minimal effort.