If you sell products with variations such as size, colour, or material, setting up a variable product in WooCommerce is essential. Variable products allow customers to choose from different options without you having to create separate product pages for each variation.
In this guide, we’ll walk you through the step-by-step process of adding a variable product in WooCommerce, making it easy for your customers to select the options they want.
What is a Variable Product?
A variable product in WooCommerce is a product that has multiple variations, each with different attributes like size, colour, or material. For example, if you sell t-shirts in different sizes and colours, a variable product allows customers to select their desired size and colour from a single product page.
Step 1: Set Up Product Attributes
Before you create a variable product, you’ll need to set up product attributes. Product attributes are the variations that make your product different, such as sizes or colours.
- Go to Product Attributes: Log in to your WordPress dashboard and navigate to Products > Attributes. This is where you’ll set up the different variations for your product.
- Add a New Attribute: In the Add New Attribute section, enter the name of your attribute (e.g., Size or Colour). Slugs are generated automatically but can be customised. After that, click Add Attribute.
- Configure Terms for the Attribute: Once your attribute is created, you’ll need to add terms (values) to it. For example, for the “Size” attribute, the terms might be Small, Medium, and Large. To do this, click Configure Terms next to the attribute, then add the different options for your attribute. Repeat this process for any other attributes, like Colour.

Step 2: Create the Variable Product
Now that you’ve created attributes, it’s time to create the variable product.

- Add a New Product: From your WordPress dashboard, go to Products > Add New. Enter the product name, description, and any other details. Scroll down to the Product Data section.
- Choose Variable Product: In the Product Data dropdown, select Variable Product. This setting allows you to add different variations for your product.
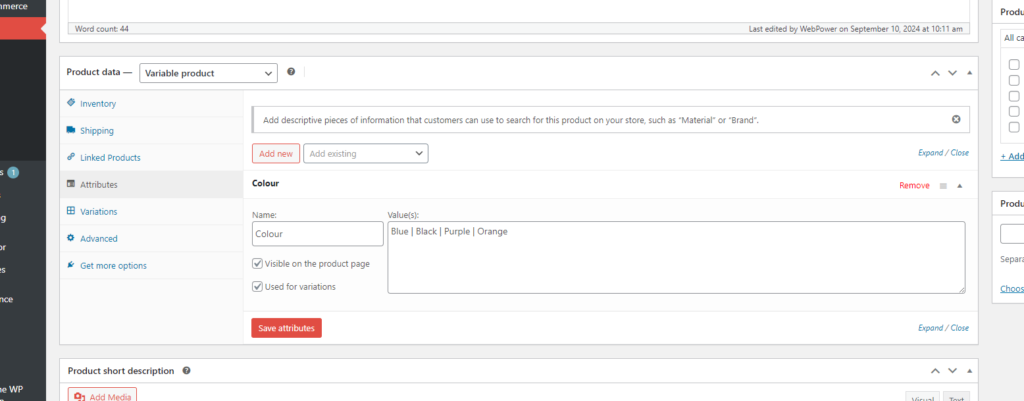
- Add Attributes: Under the Product Data section, click on the Attributes tab. From the dropdown menu, choose the attribute you created earlier (e.g., Size or Colour), and click Add. Check the box next to Used for variations, and then enter the terms (e.g., Small, Medium, Large) by clicking Select All or typing them in manually.Repeat this process for all other attributes you need (e.g., Colour). Once done, click Save Attributes.
Step 3: Configure Product Variations
Now that the attributes are set up, it’s time to configure the variations of your product.
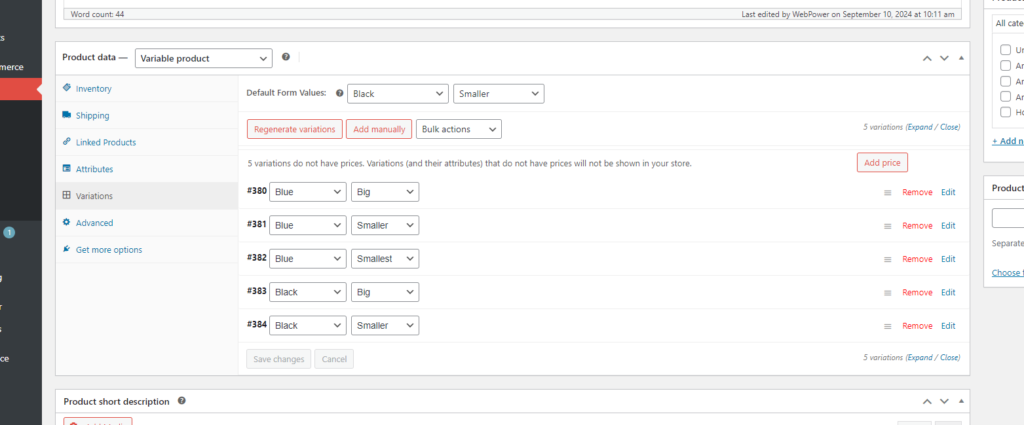
- Go to Variations Tab: Click on the Variations tab under Product Data. You can now create variations for each combination of attributes. In the dropdown that says Add variation, select Create variations from all attributes, then click Go. This will automatically create all possible combinations of the attributes (e.g., Small-Red, Medium-Blue).
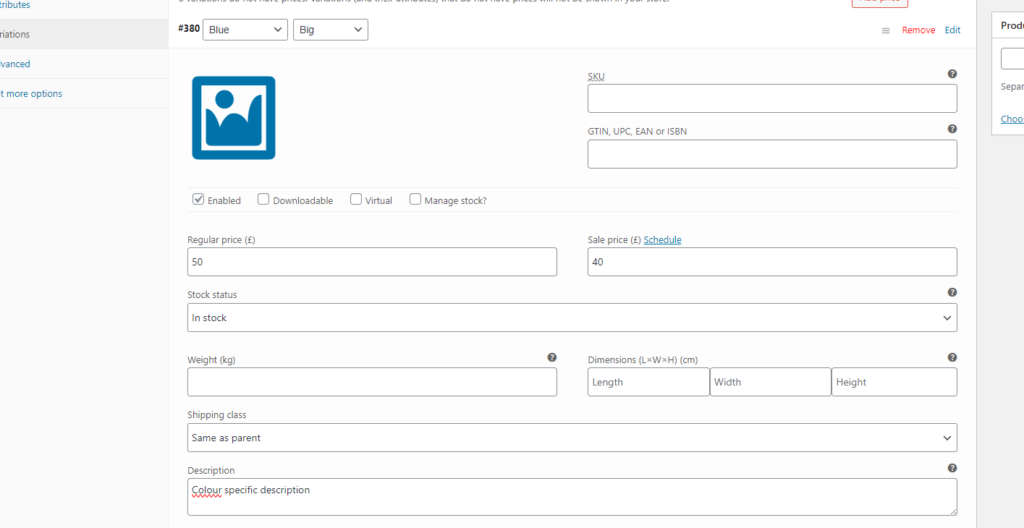
- Edit Each Variation: Once WooCommerce has generated the variations, you can customise each one. Click the arrow next to a variation to expand its options. Here, you can set the price, stock status, SKU, and images for each variation. If all variations share the same price, you can set it globally by selecting Set regular prices from the dropdown menu and clicking Go.
- Stock Management: If you manage stock for each variation individually, you can set the stock quantity for each variation. For example, you might have more Small Red t-shirts in stock than Large Blue ones. If you do not manage stock on a per-variation basis, leave the stock options blank.
- Upload Variation Images: To make it easy for customers to choose the correct variation, you can upload images for each variation. For example, if you have a Red and Blue t-shirt, you can upload separate images for each colour. This will change the product image when the customer selects a particular variation.
Once you’ve configured all variations, click Save Changes.
Step 4: Complete the Product Details
After setting up your variations, complete the rest of your product details:
- Product Short Description: This is the short description that appears next to the product image on your product page. Keep it concise and highlight key details like material, fit, or any special features.
- Product Categories and Tags: Assign the product to a category and add any relevant tags. This helps with organisation and makes it easier for customers to browse your store.
- Product Image and Gallery: Upload a primary product image that will represent the product on your shop page. You can also add additional gallery images to showcase the product from different angles.
Step 5: Publish the Product
Once you’ve finished configuring all the details, click Publish to make the product live on your WooCommerce store. Customers can now view the product, select their desired options from the dropdowns, and purchase the variation that best suits their needs.
Managing Variable Products
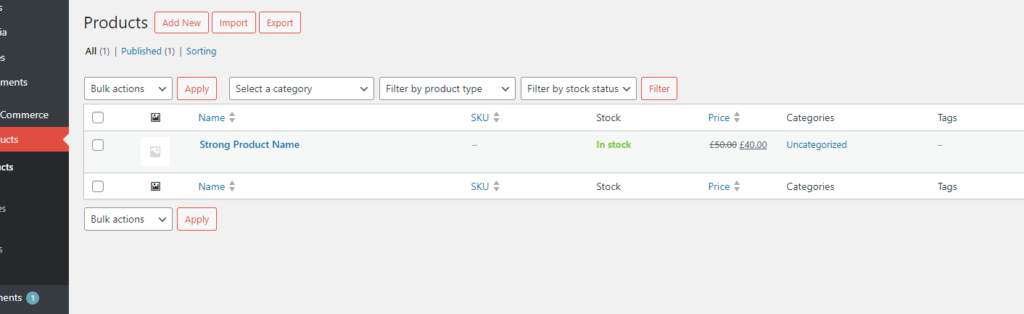
After creating a variable product, you may need to make updates or changes over time. You can easily edit a variable product by going to Products > All Products and clicking Edit under the product name. From here, you can update pricing, add new variations, and adjust stock levels.
Conclusion
Creating variable products in WooCommerce allows you to offer different options for your products, such as size, colour, or material, all from a single product page. This improves user experience and makes it easier for customers to shop for products with multiple variations. By following the steps outlined above, you can efficiently add variable products to your WooCommerce store and streamline your eCommerce setup.
With well-organised and flexible product options, your store will be better equipped to meet customer demands and deliver a great shopping experience.