Migrating your WordPress website to a new host or domain can seem like a daunting task, but it doesn’t have to be. With the right tools, you can make the process seamless and hassle-free. One of the most popular and user-friendly plugins for migrating WordPress websites is WP All-in-One Migration. In this guide, we’ll show you how to migrate your WordPress site using this plugin, completely free of charge.
Why Migrate Your WordPress Website?
There are several reasons why you might need to migrate your WordPress website:
- Changing Hosts: You might be moving to a new hosting provider for better performance or support.
- Domain Change: If you’re rebranding or changing your domain name, migrating your site will ensure all your content follows the new address.
- Testing: Migrating your site to a staging environment allows you to test updates and changes before applying them to your live site.
Why Use WP All-in-One Migration?
WP All-in-One Migration is a powerful plugin that simplifies the migration process. Its key benefits include:
- Ease of Use: The plugin offers an intuitive interface that makes migrating your site straightforward.
- No Technical Skills Required: You don’t need advanced technical knowledge to use this plugin.
- Free Version Available: The basic version of the plugin is free and provides all the essential features for migration.
Step 1: Install the WP All-in-One Migration Plugin
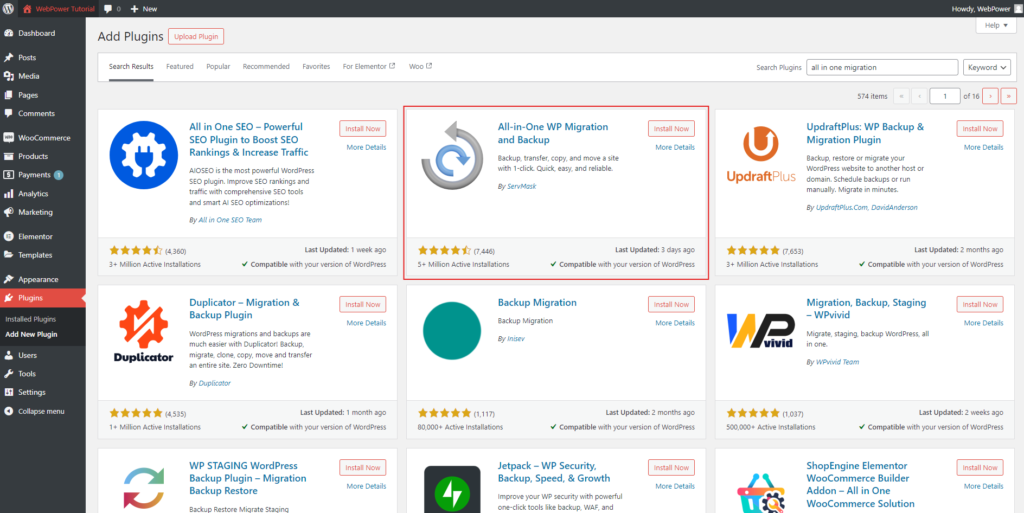
To start, you need to install and activate the WP All-in-One Migration plugin on your current WordPress site.
- Log in to Your WordPress Dashboard: Access your WordPress admin panel by going to
www.yourdomain.com/wp-admin. - Navigate to Plugins: In the left-hand menu, click on “Plugins” and then “Add New.”
- Search for the Plugin: In the search bar, type “WP All-in-One Migration” and press enter.
- Install the Plugin: Click the “Install Now” button next to the WP All-in-One Migration plugin. Once installed, click “Activate” to enable the plugin.
Step 2: Export Your WordPress Website
With the plugin installed, you’re ready to export your site.
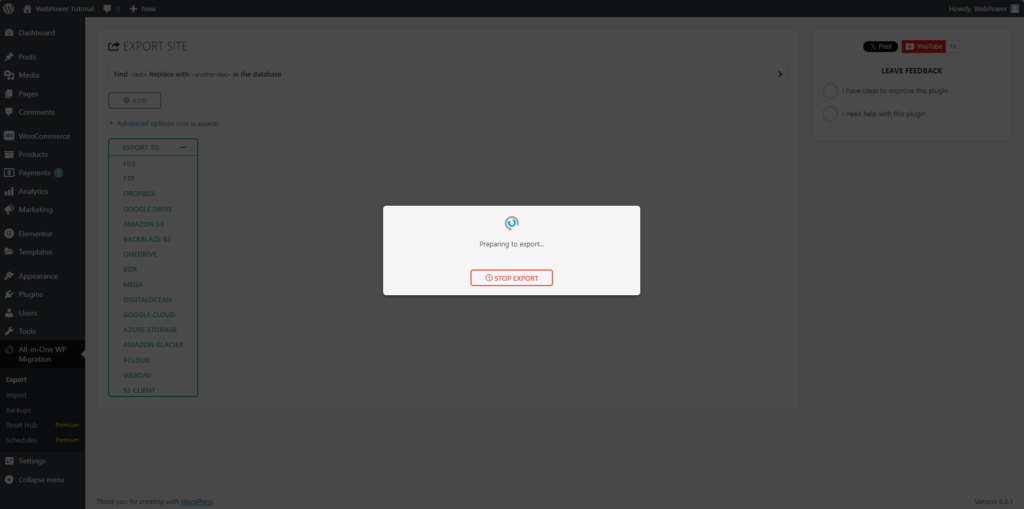
- Go to WP All-in-One Migration: In the WordPress dashboard menu, find the “All-in-One WP Migration” tab and click on it.
- Select “Export”: Click on the “Export” tab to start the export process.
- Choose Export Options: You can choose to export your site as a file. Click on the “Export To” button and select “File” from the dropdown menu.
- Download the Export File: The plugin will generate a file containing your site’s data. Once the process is complete, download the file to your computer.
Step 3: Install the WP All-in-One Migration Plugin on the New Site
Before importing your site, install and activate the WP All-in-One Migration plugin on your new WordPress installation.
- Log in to the New WordPress Site: Access the admin panel of your new site.
- Repeat the Installation Steps: Follow the same steps as before to install and activate the WP All-in-One Migration plugin on the new site.
Step 4: Import Your WordPress Website
Now it’s time to import your site to the new location.
- Go to WP All-in-One Migration on the New Site: Click on the “All-in-One WP Migration” tab in the new site’s WordPress dashboard.
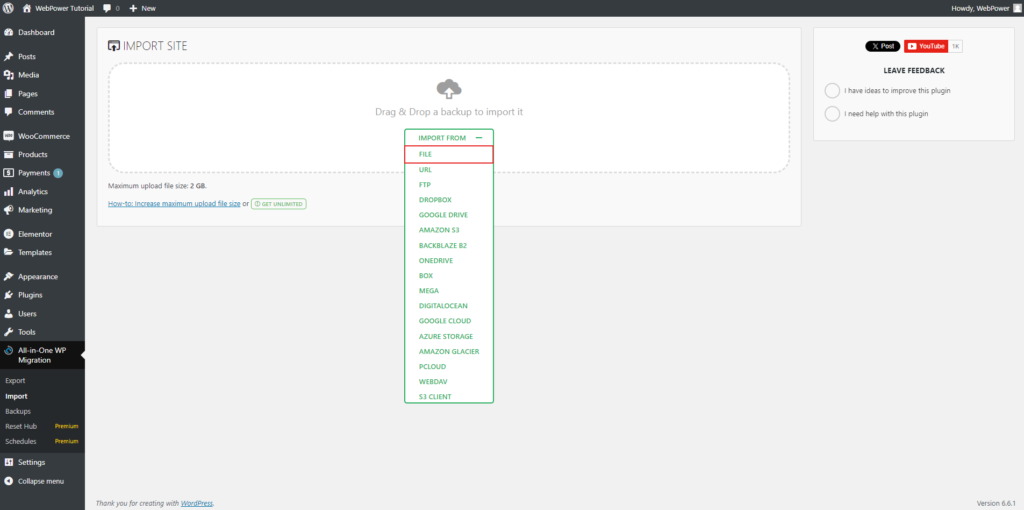
- Select “Import”: Click on the “Import” tab to start the import process.
- Upload the Export File: Click the “Import From” button and select “File.” Upload the export file you downloaded earlier.
- Complete the Import: The plugin will process the file and migrate your site to the new location. Once completed, you’ll be prompted to review and adjust your permalinks and settings as necessary.
Step 5: Verify Your Site
After importing, it’s important to check that everything has been transferred correctly.
- Check Your Website: Visit your new site and review the content, images, and functionality to ensure everything is in place.
- Test Links and Functionality: Click through various pages, test forms, and other interactive elements to confirm they are working as expected.
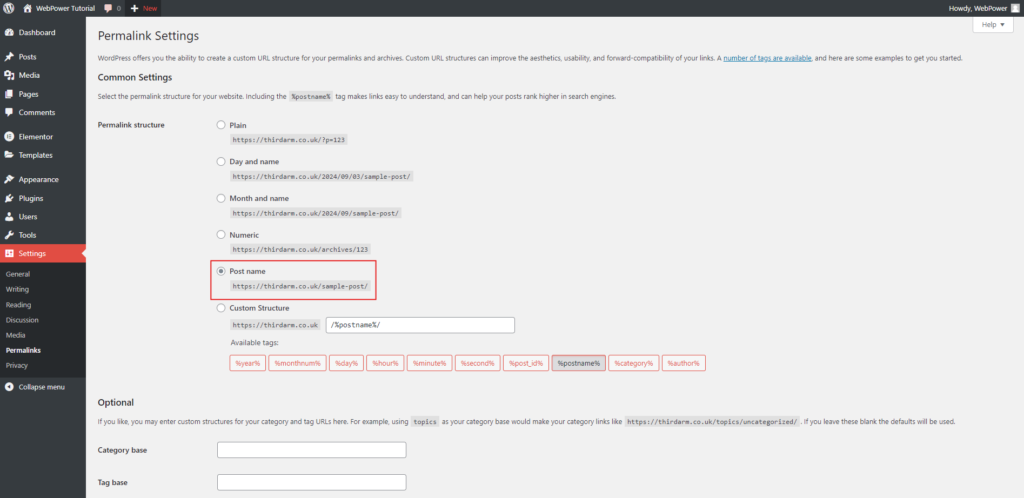
- Update Permalinks: Go to “Settings” > “Permalinks” in the WordPress dashboard and click “Save Changes” to refresh your permalink structure.
Conclusion
Migrating your WordPress website using the WP All-in-One Migration plugin is a straightforward process that can be completed for free. By following these steps, you can easily move your site to a new host or domain without the need for technical expertise. If you encounter any issues during the migration,
WebPower’s support team is here to assist you with any questions or problems.

