One of the most important steps in getting your website online is connecting your domain to your hosting service. This is done by changing the nameservers for your domain, which tells the domain where your website is hosted. Whether you’ve purchased your domain through WebPower or another provider, updating the nameservers is a straightforward process.
In this blog, we’ll show you how to change the nameservers to point your domain to your website using WebPower’s dashboard. If you’ve watched our video tutorial, you’ve seen how easy this process can be. Follow along with our detailed steps below!
What Are Nameservers?
Nameservers are essentially the middlemen between your domain and your hosting provider. They tell the internet where your domain’s content is hosted so visitors can access your site. If your nameservers aren’t correctly configured, visitors will see an error when trying to access your site.
By changing the nameservers, you are directing your domain to the correct hosting platform—where your website files are located.
Step 1: Log in to Your WebPower Account
To start, you’ll need to log in to your WebPower account, where you manage your domains and hosting services.
- Go to WebPower’s login page: Head over to the WebPower login page.
- Enter your credentials: Log in using your username and password.
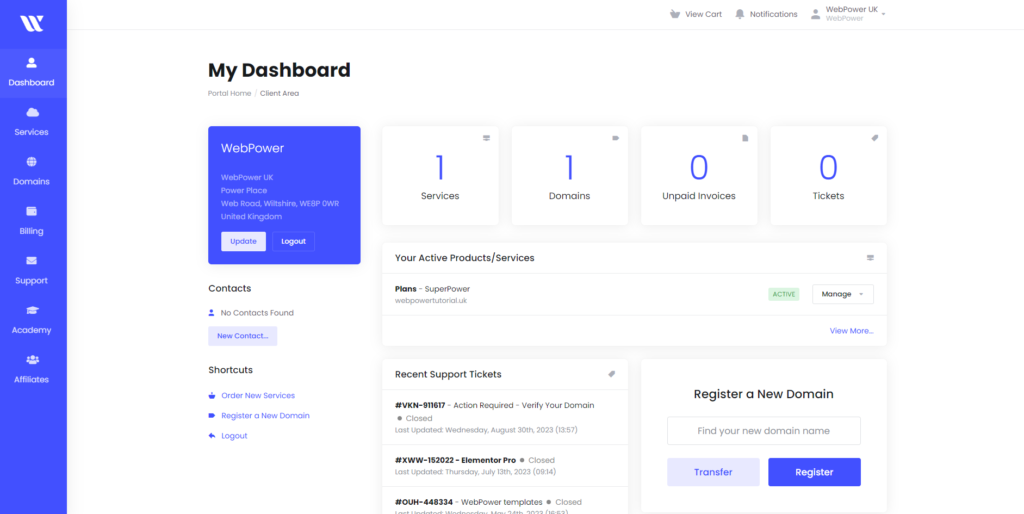
Once you’re logged in, you’ll be taken to the main dashboard where you can manage your domains, hosting, and other services.
Step 2: Navigate to Your Domain Management
Next, you’ll need to access the domain you want to point to your hosting service.
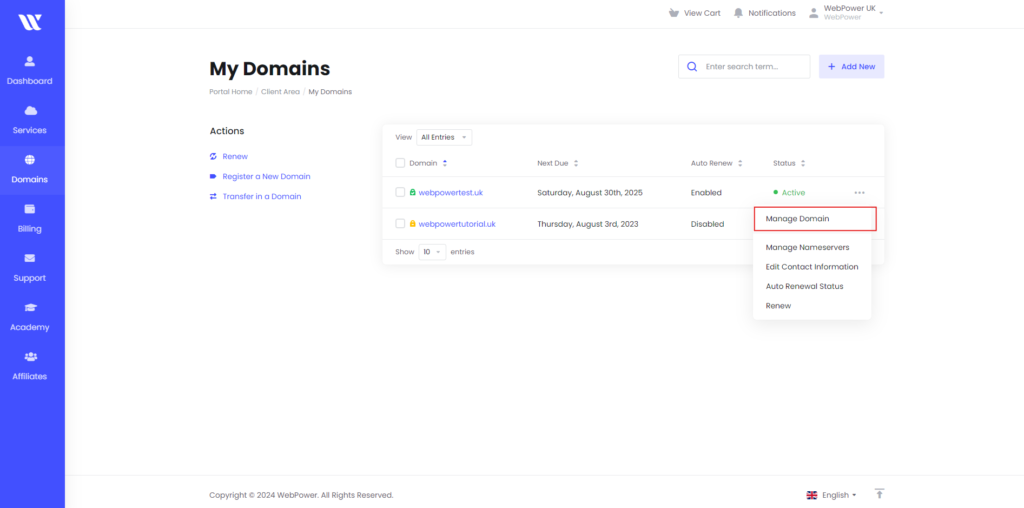
- Go to “Domains”: In the WebPower dashboard, look for the “Domains” section. This is where all your purchased domains are listed.
- Select the Domain: Find the domain you wish to point to your website and click on “Manage Domain” next to it.
Step 3: Change the Nameservers
Now that you’re in the domain management section, it’s time to update the nameservers to point your domain to your hosting provider.
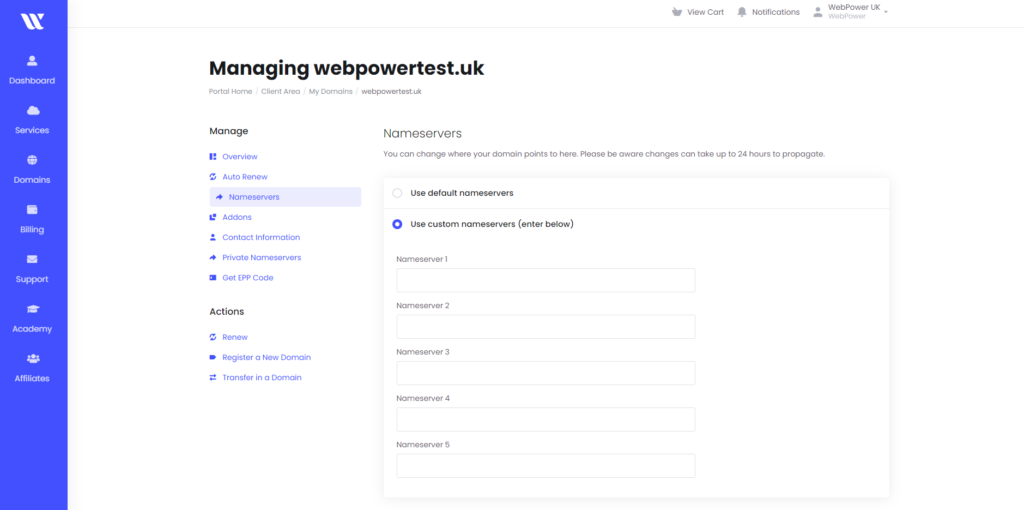
- Go to “Nameservers”: In the domain management page, locate the “Nameservers” option. This is where you’ll make the necessary changes.
- Select “Custom Nameservers”: By default, the nameservers might be set to WebPower’s. To point your domain to your hosting, click on the option for “Custom Nameservers.”
- Enter Your Hosting Provider’s Nameservers: Here, you’ll need to enter the nameservers provided by your hosting provider.
- Save Changes: After entering the correct nameservers, click the “Save Changes” button. This will update the nameservers for your domain.
WebPower’s nameservers are:
- ns1.webpower.uk
- ns2.webpower.uk
Step 4: Wait for DNS Propagation
After updating the nameservers, it can take up to 24-48 hours for the changes to propagate across the internet. During this time, your domain may go through intermittent downtime, but this is normal.
To check if your nameservers have been updated correctly, you can use an online tool like What’s My DNS to see if your new nameservers are resolving properly.
Common Issues & Troubleshooting
If your website isn’t displaying correctly after updating the nameservers, here are some common issues to look out for:
- Propagation Delay: It can take up to 48 hours for changes to take effect globally. Be patient and check again after some time.
- Incorrect Nameservers: Double-check the nameservers provided by your hosting provider and ensure they’re entered correctly.
- Cached Data: Your browser might have cached the old DNS information. Try clearing your browser cache or accessing the site from a different device.
Conclusion
Changing the nameservers to point your domain to your website is a crucial step in getting your site online. With WebPower, the process is easy and quick. Once the changes propagate, your domain will be correctly linked to your hosting, and your website will be live for the world to see.
By following these simple steps, you can ensure your website is connected to the right hosting service, allowing your visitors to access your content without any issues.
If you need further assistance, feel free to contact WebPower’s support team, and we’ll be happy to guide you through the process.

