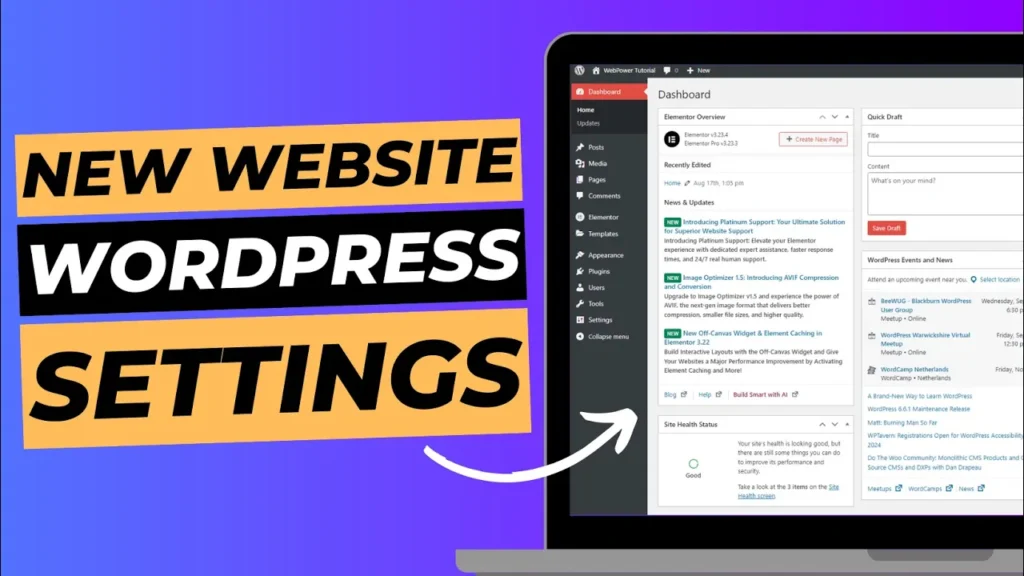
The WordPress dashboard is your control centre, where you’ll manage your site’s content, appearance, and functionality. In this guide, we’ll walk you through the essential steps to set up your WordPress dashboard properly, ensuring your website is ready for content creation and customisation.
What You’ll Learn:
- Installing WordPress using the Softaculous installer in cPanel
- Cleaning up your new WordPress installation by removing sample posts, pages, and unused themes
- Adding and setting up a homepage
- Configuring user settings, permalink structure, and setting the homepage as a static page
Let’s get started!
Step 1: Installing WordPress Using Softaculous
The first step in setting up your WordPress dashboard is installing WordPress on your domain. At WebPower, we make this process easy with the Softaculous installer available in cPanel.
How to Install WordPress with Softaculous:
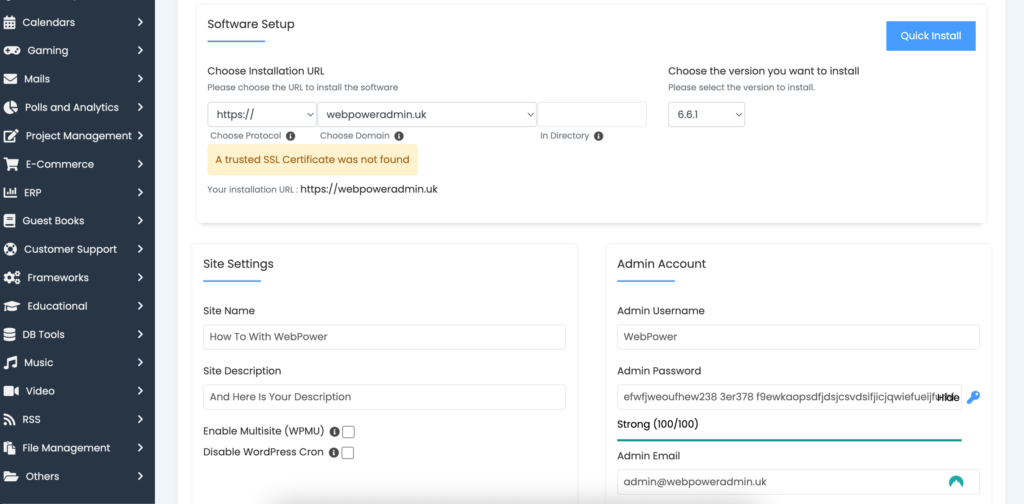
- Log in to cPanel: Access your WebPower hosting account and log in to cPanel.
- Locate Softaculous: Scroll down to the ‘Software’ section in cPanel and click on ‘Softaculous Apps Installer’.
- Select WordPress: In Softaculous, find and select ‘WordPress’ from the list of available scripts.
- Click ‘Install Now’: Click on the ‘Install Now’ button to start the installation process.
- Fill in the Details: You’ll need to fill in some basic information, including your site name, admin username, and password. Make sure to choose a strong password for security.
- Choose Your Domain: If you have multiple domains, select the one where you want to install WordPress. Leave the ‘Directory’ field blank to install WordPress in the root directory (e.g., yourdomain.com).
- Select Your Language: Choose your preferred language for WordPress.
- Click ‘Install’: Once everything is set, click the ‘Install’ button. Softaculous will take care of the rest, and within minutes, WordPress will be installed on your domain.
Step 2: Cleaning Up Sample Content
After installing WordPress, your new site will include some sample content—like posts and pages—that you won’t need. Let’s clean those up.
Removing Sample Posts and Pages:
- Log in to Your WordPress Dashboard: Go to yourdomain.com/wp-admin and log in with the credentials you set during the installation.
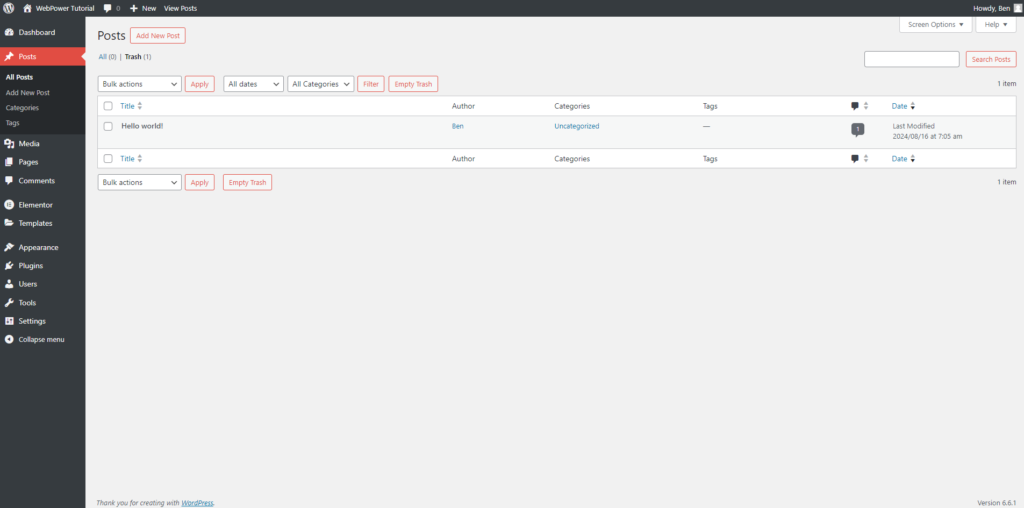
- Delete the Sample Post: In your dashboard, go to Posts > All Posts. You’ll see a sample post titled “Hello World!”. Hover over it and click ‘Trash’.
- Delete the Sample Page: Navigate to Pages > All Pages. There’s typically a sample page titled “Sample Page”. Hover over it and click ‘Trash’.
- Empty the Trash: To permanently remove these items, go to the Trash tab and click ‘Empty Trash’.
Step 3: Adding and Setting Up a Homepage
Your homepage is the first thing visitors will see, so it’s important to set it up correctly.
Creating a Homepage:
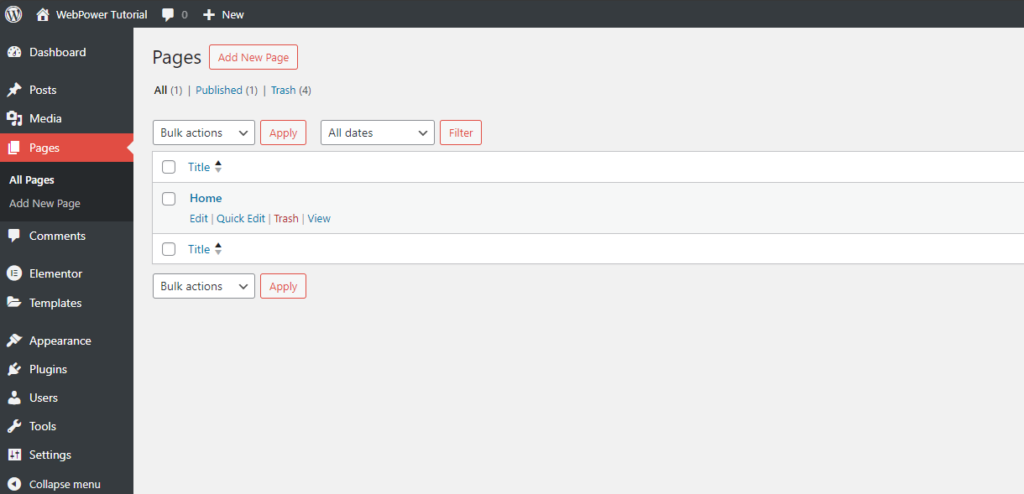
- Go to Pages > Add New: In your dashboard, navigate to Pages > Add New to create a new page.
- Name Your Page: Title this page ‘Home’ or something similar, and click ‘Publish’ to save it. You can add content later, but for now, we’re just setting up the structure.
Step 4: Removing Unused Themes
By default, WordPress installs several themes, but you only need one active theme. Let’s remove the unused ones.
How to Remove Unused Themes:
- Go to Appearance > Themes: In your dashboard, go to Appearance > Themes.
- Delete Unused Themes: Hover over any theme that you’re not using and click ‘Theme Details’. In the bottom-right corner, click ‘Delete’. Confirm the deletion.
Step 5: Removing Unused Plugins
Similarly, WordPress may come with pre-installed plugins that you don’t need.
How to Remove Unused Plugins:
- Go to Plugins > Installed Plugins: Navigate to Plugins > Installed Plugins in your dashboard.
- Deactivate and Delete: If there are plugins you don’t plan to use, first deactivate them by clicking ‘Deactivate’. Then, click ‘Delete’ to remove them from your site.
Step 6: Confirming User Settings
It’s essential to confirm that your user settings are correct, especially if multiple people will be managing the site.
How to Confirm User Settings:
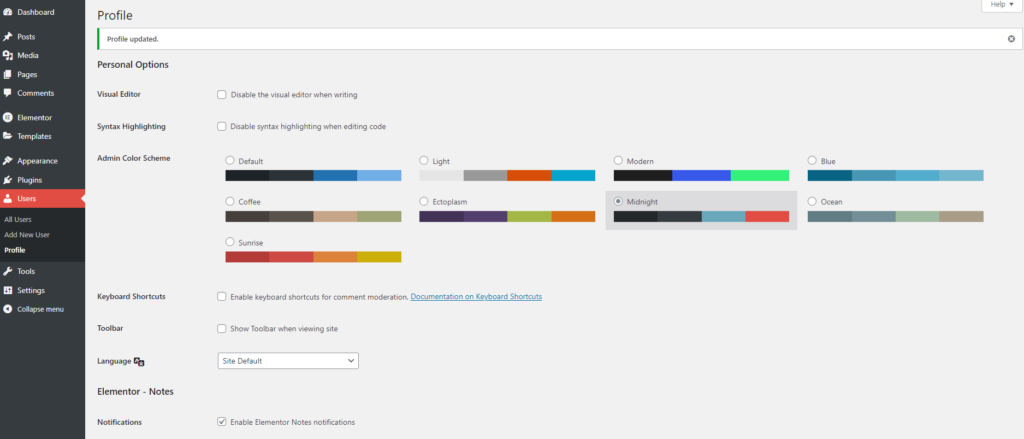
- Go to Users > All Users: In the dashboard, go to Users > All Users to see a list of users registered on your site.
- Check Admin Details: Ensure your admin account has the correct email address and role assigned. If you’re the only user, there should only be one admin listed.
- Update Your Profile: Click on your username to update your profile, including your name, contact information, and other personal details.
Step 7: Setting the Homepage as a Static Page
Now that you’ve created your homepage, it’s time to set it as the front page of your site.
How to Set a Static Homepage:
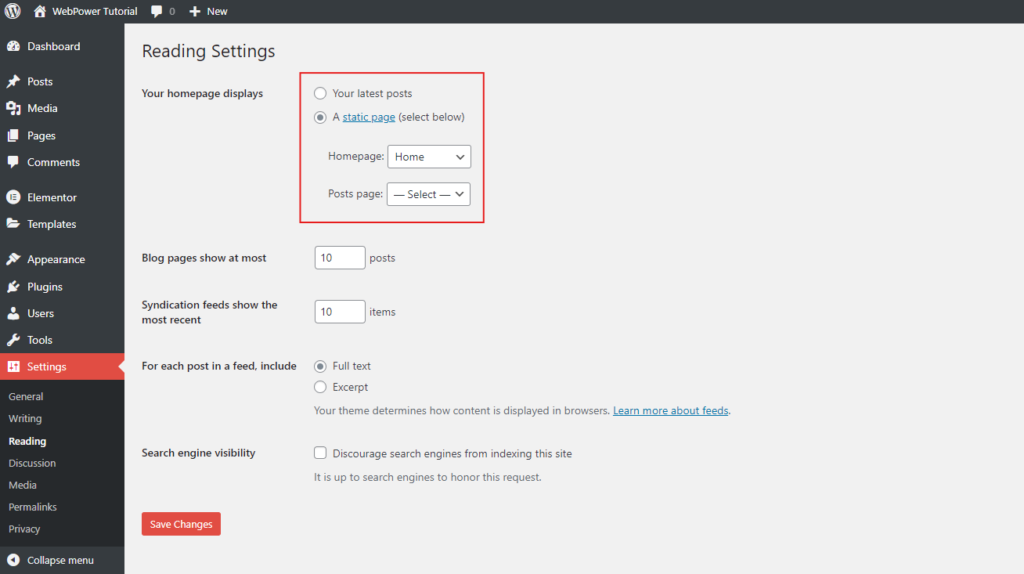
- Go to Settings > Reading: In the dashboard, navigate to Settings > Reading.
- Select ‘A Static Page’: Under ‘Your homepage displays’, select ‘A static page’.
- Choose Your Homepage: From the dropdown menu, select the page you created earlier (e.g., ‘Home’).
- Save Changes: Click ‘Save Changes’ to apply your new settings.
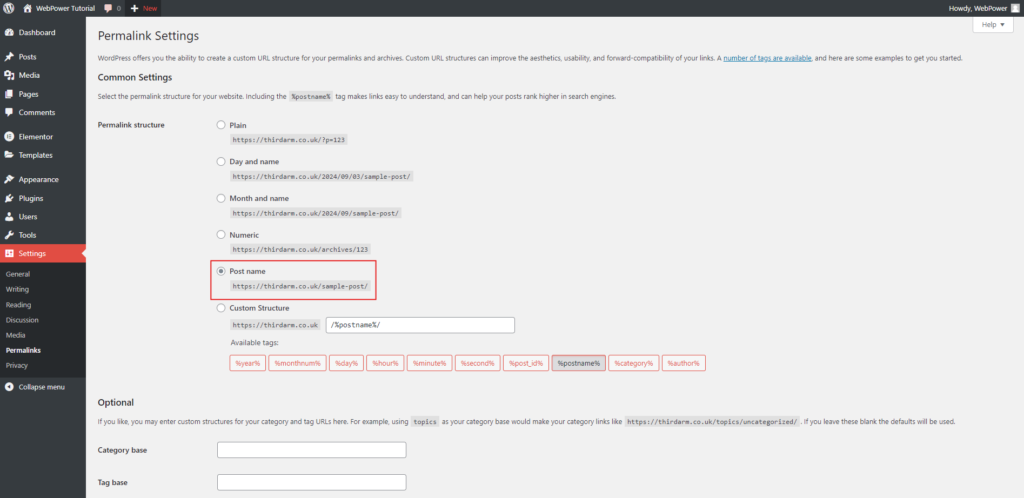
Step 8: Setting the Permalink Structure to Post Name
Permalinks are the URLs used for your posts and pages. Setting them to ‘Post Name’ makes them cleaner and more SEO-friendly.
How to Set Permalinks to Post Name:
- Go to Settings > Permalinks: In the dashboard, go to Settings > Permalinks.
- Select ‘Post Name’: Under ‘Common Settings’, choose the ‘Post Name’ option.
- Save Changes: Click ‘Save Changes’ to update your permalink structure.
Conclusion
Setting up your WordPress dashboard is the first step in building a successful website. By following these steps, you’ve ensured that your site is not only functional but also optimised for performance and ease of use. From installing WordPress to configuring essential settings, your dashboard is now ready for you to start creating content and customising your site.

