Adding entrance animations to your WordPress website can significantly enhance the user experience by making your content more engaging and visually appealing. Elementor, a popular page builder plugin, offers a variety of animation options that allow you to bring your website elements to life as visitors scroll through your pages. This guide will walk you through the process of adding entrance animations using Elementor.
Why Use Entrance Animations?
Entrance animations can provide several benefits to your website:
- Attract Attention: Highlight important content or calls-to-action by making them stand out.
- Improve User Engagement: Create a more interactive and enjoyable browsing experience.
- Enhance Visual Appeal: Add dynamic elements to your site to make it more visually attractive.
- Guide User Focus: Direct visitors’ attention to specific parts of your page as they scroll.
Prerequisites
Before you start, ensure you have the following:
- WordPress Installed: Make sure your WordPress site is up and running.
- Elementor Plugin: Install and activate the Elementor plugin. The free version provides basic animations, while Elementor Pro offers more advanced options.
How To Add Entrance Animations Using Elementor
Step 1: Open Your Page in Elementor
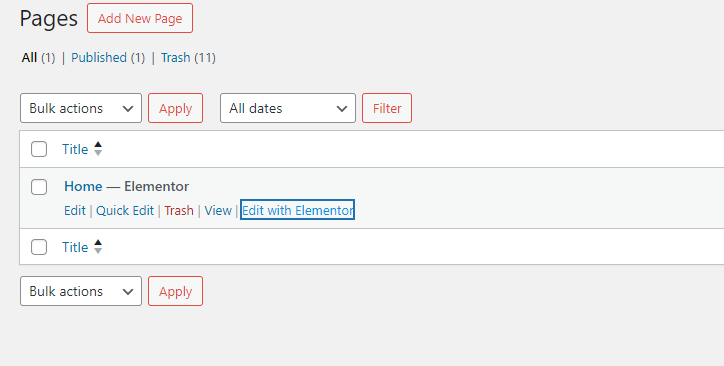
- Log into Your WordPress Dashboard: Access the admin area of your WordPress site.
- Navigate to Pages: Go to Pages from the left-hand menu and select the page where you want to add animations.
- Edit with Elementor: Click Edit with Elementor to open the Elementor page builder.
Step 2: Select the Element to Animate
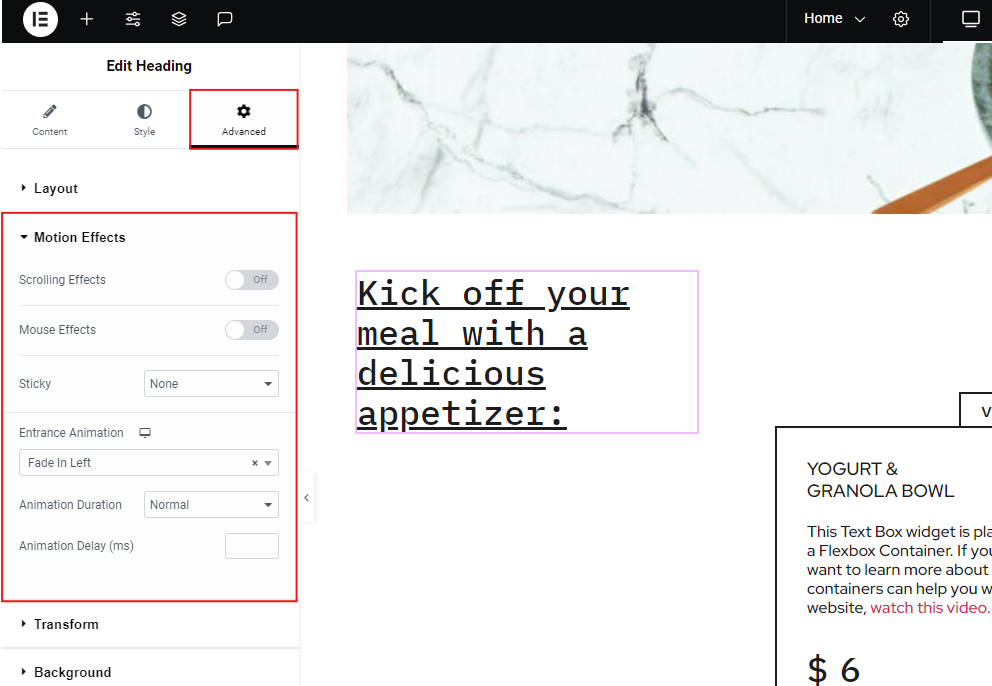
- Choose the Element: Click on the element (e.g., heading, image, button) you want to animate. This will open the element’s settings panel on the left.
- Access Advanced Settings: In the settings panel, navigate to the Advanced tab. This is where you’ll find animation options.
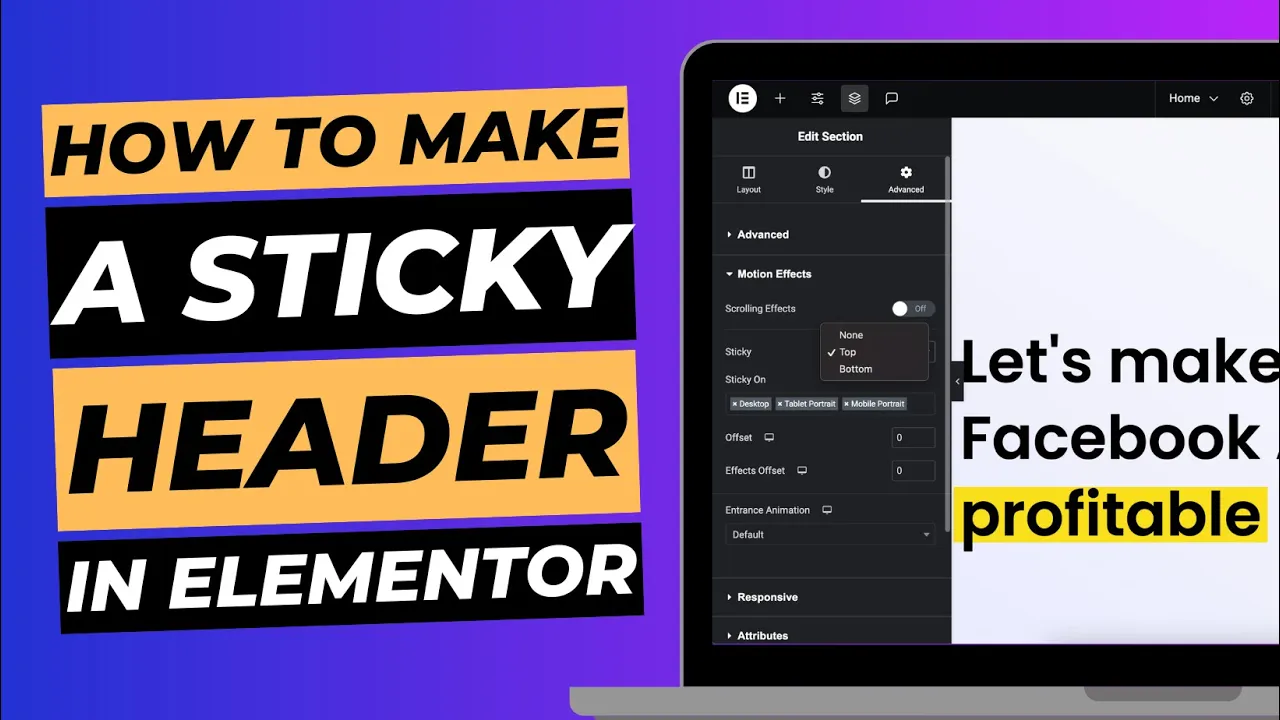
Step 3: Add Entrance Animation
- Open Motion Effects: Within the Advanced tab, click on Motion Effects.
- Enable Entrance Animation: Under the Motion Effects section, you’ll see the Entrance Animation dropdown menu. Click on this menu to reveal the available animation options.
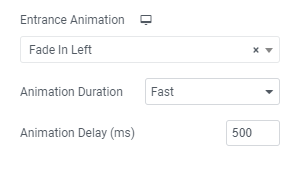
- Choose an Animation: Select the animation you want from the list. Elementor provides various options, such as Fade In, Slide In, Bounce, and more. Choose one that best suits your design needs.
- Adjust Animation Settings: Depending on the animation selected, you may have options to adjust the duration, delay, and trigger for the animation. Fine-tune these settings to achieve the desired effect.
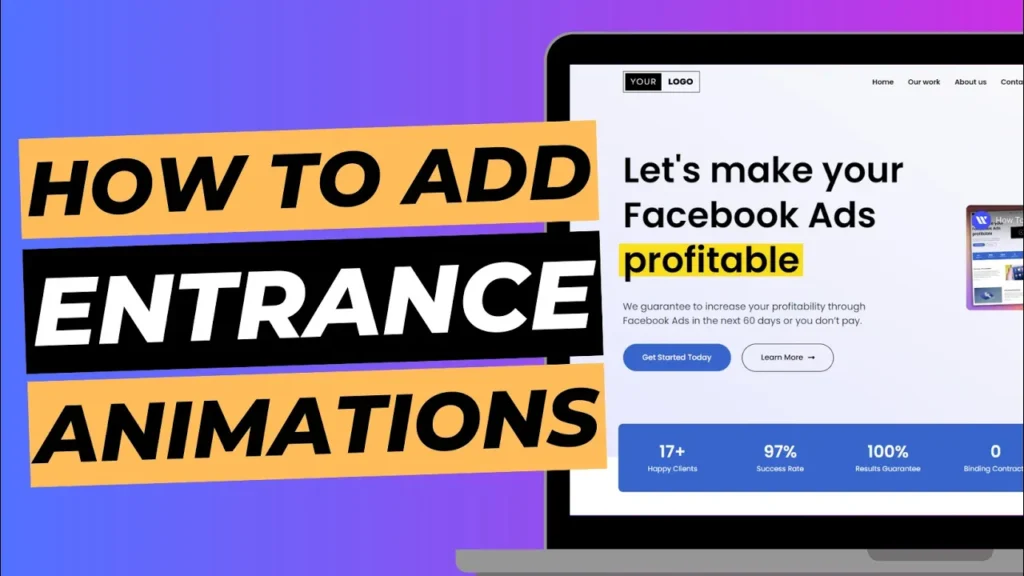
Step 4: Preview and Publish
- Preview Your Page: Click on the Preview Changes button (eye icon) at the bottom of the Elementor panel to see how the animation looks on the live page.
- Make Adjustments: If necessary, go back to the animation settings and make any adjustments until you are satisfied with the result.
- Publish or Update: Once you’re happy with how the animations look, click Publish (or Update if you’re editing an existing page) to make the changes live on your site.

Best Practices for Using Entrance Animations
- Keep It Subtle: Overusing animations can overwhelm visitors. Use animations sparingly to highlight key elements without distracting from the content.
- Consider Load Times: Some animations can affect page load times. Ensure that animations do not negatively impact your site’s performance.
- Maintain Accessibility: Ensure that animations do not hinder accessibility. Provide alternative ways for users to access content if animations are not supported.
- Test on Different Devices: Verify that animations work well across various devices and screen sizes to ensure a consistent user experience.
Troubleshooting
If you encounter issues with entrance animations, consider the following:
- Check Plugin Compatibility: Ensure that Elementor is updated to the latest version and compatible with your WordPress theme.
- Clear Browser Cache: Sometimes, cached data can affect the display of animations. Try clearing your browser cache and reloading the page.
- Inspect CSS Conflicts: Custom CSS or other plugins might conflict with Elementor’s animations. Disable other plugins temporarily to identify potential conflicts.
Conclusion
Adding entrance animations to your WordPress website using Elementor can enhance the visual appeal and user engagement of your pages. By following the steps outlined in this guide, you can easily apply animations to various elements and create a dynamic, interactive experience for your visitors.
If you have any questions or need further assistance with Elementor or animations, feel free to reach out for support.