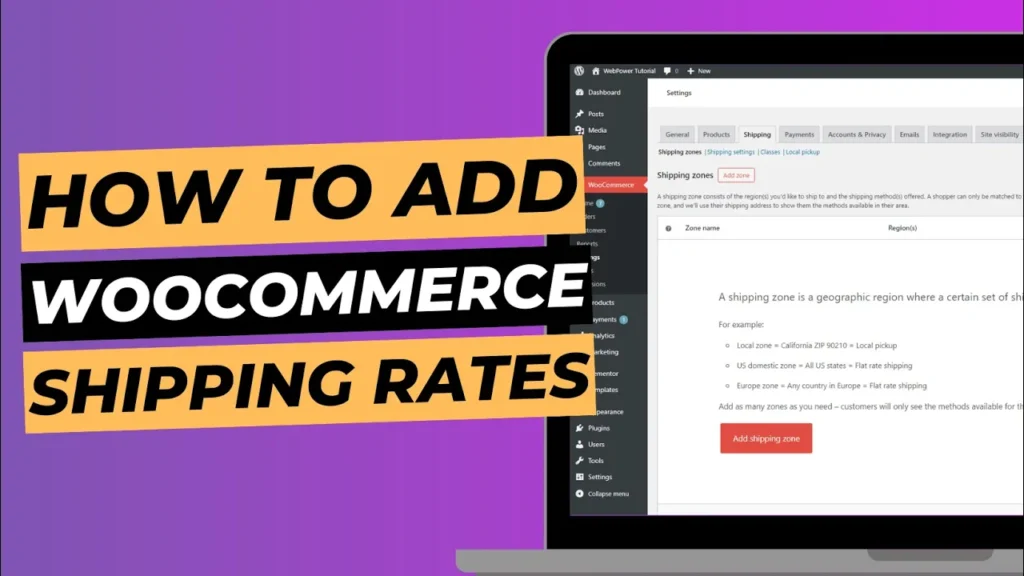
Setting up shipping rates in WooCommerce is a vital part of running an eCommerce store. Whether you ship locally, nationally, or internationally, you need to configure shipping options that suit both your business and your customers. In this blog post, we’ll walk you through the process of adding shipping rates in WooCommerce to ensure a seamless checkout experience for your customers.
Why Are Shipping Rates Important?
Shipping rates can influence a customer’s decision to purchase from your online store. Offering clear, competitive, and reliable shipping options builds trust and encourages sales. With WooCommerce, you have the flexibility to configure a variety of shipping methods, such as flat rates, free shipping, or real-time carrier rates.
Step 1: Set Up WooCommerce Shipping Zones
Before adding shipping rates, you’ll first need to create shipping zones. Shipping zones allow you to assign different shipping methods and costs based on the geographical location of your customers.
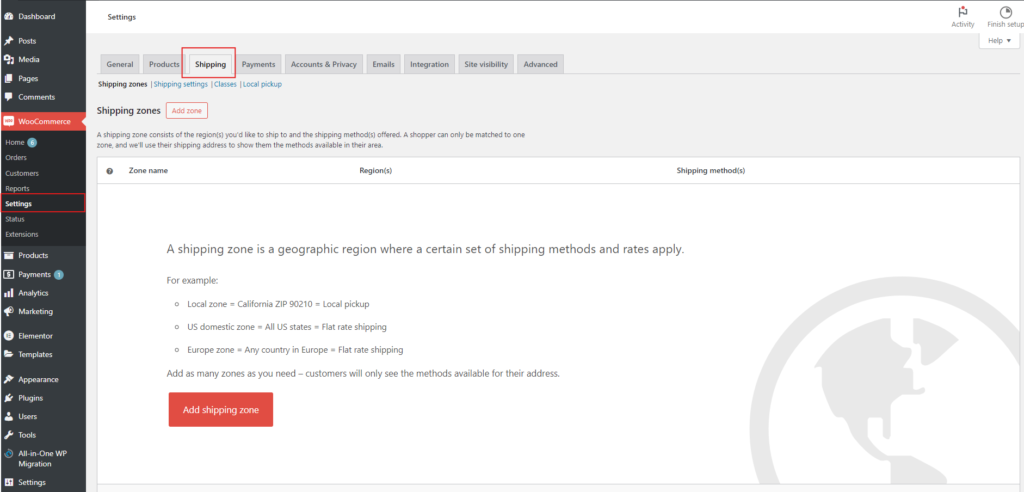
- Navigate to Shipping Settings: Log in to your WordPress dashboard, go to WooCommerce > Settings and click on the Shipping tab.
- Add a New Shipping Zone: In the Shipping Zones section, click on Add Shipping Zone. Here, you’ll define the region where this shipping zone will apply. For example, you can create zones for specific countries, regions within countries, or even specific zip codes.
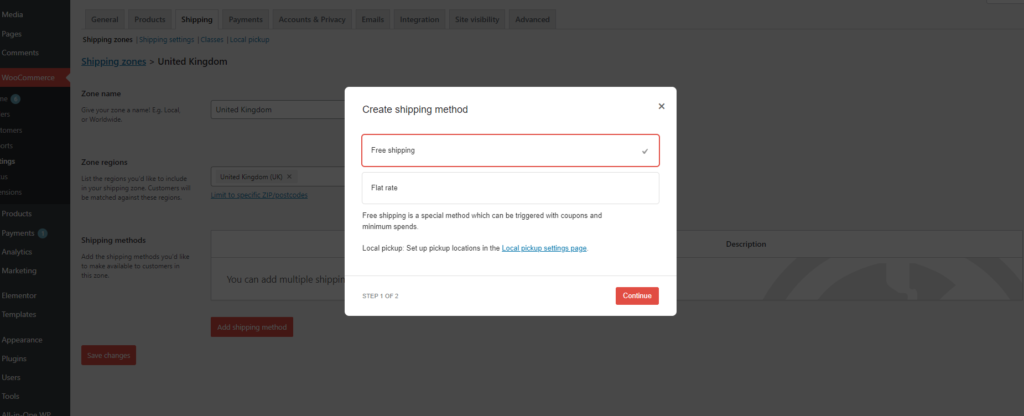
- Assign Shipping Methods to the Zone: Once the zone is created, you’ll see an option to add shipping methods. WooCommerce provides three default methods: Flat Rate, Free Shipping, and Local Pickup. Click Add Shipping Method, select the appropriate option, and click Add Shipping Method again.
Step 2: Configure Flat Rate Shipping
Flat rate shipping is one of the most common and simple methods. You charge a fixed rate for shipping, regardless of weight or size. Here’s how to set it up:
- Select Flat Rate Method: After adding the shipping method, click Edit next to Flat Rate to configure the settings.
- Set Shipping Cost: In the Cost field, enter the amount you want to charge for shipping. For example, you could enter £5 for flat-rate shipping across all orders in this zone. If you want to add additional costs for specific items, you can use the formula [qty] * 1.50 to charge £1.50 per item.
- Save Changes: Once you’ve entered the flat rate, click Save Changes. Customers in this shipping zone will now see the flat rate as an option at checkout.

Step 3: Set Up Free Shipping
Free shipping can be a powerful marketing tool to encourage larger orders. WooCommerce allows you to offer free shipping based on various conditions, such as a minimum order amount.
- Choose Free Shipping Method: In the shipping zone, click Add Shipping Method, and select Free Shipping.
- Configure Free Shipping Requirements: Click Edit next to the Free Shipping method. You can offer free shipping under specific conditions.
- Save Changes: Once you’ve set the conditions for free shipping, click Save Changes. Customers in the specified zone who meet the criteria will see the free shipping option at checkout.
Step 4: Local Pickup
If your business operates locally, you may want to offer a Local Pickup option. This allows customers to collect their orders in person.
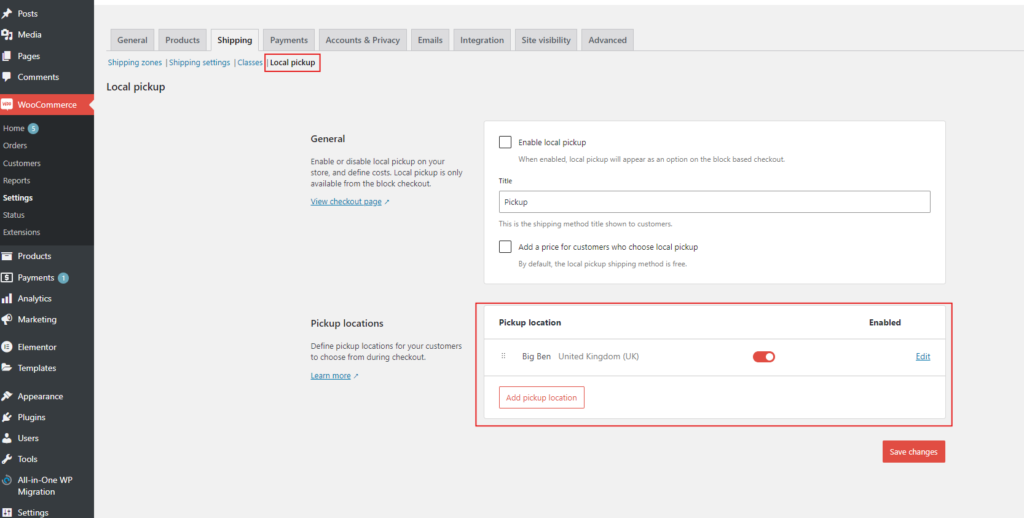
- Add Local Pickup: Under the shipping zone, click Add Shipping Method and select Local Pickup. This option doesn’t require additional configuration unless you want to set a pickup fee.
- Set Pickup Cost (Optional): You can set a flat fee for local pickups if desired, but typically, this option is free.
- Save Changes: After configuring the local pickup option, click Save Changes. Customers can now choose to pick up their orders during checkout.
Step 5: Real-Time Shipping Rates (Optional)
For advanced shipping options, WooCommerce offers integrations with shipping carriers like Royal Mail, FedEx, or UPS. These integrations allow you to offer real-time shipping rates based on the customer’s location and order weight.
- Install a Carrier Plugin: If you want to offer real-time shipping rates, you’ll need to install a plugin that integrates with your preferred shipping carrier. For example, you can use the WooCommerce Shipping plugin for real-time rates from services like USPS or DHL.
- Set Up the Plugin: After installing the plugin, follow the setup instructions to connect your WooCommerce store with the shipping carrier. You’ll need to enter your account information for the carrier and configure the services you wish to offer.
- Enable Real-Time Rates: Once the plugin is configured, customers will see live shipping rates based on their location and the weight of the order. This method ensures accurate shipping costs and can improve the checkout experience for customers who want exact shipping estimates.

Step 6: Test the Shipping Rates
After setting up your shipping zones and methods, it’s important to test the checkout process to ensure everything works as expected. Go to your store, add a product to your cart, and proceed to the checkout. Enter an address that falls within one of your shipping zones to verify the correct rates appear.
If you notice any issues, return to the WooCommerce shipping settings and make adjustments as needed.
Conclusion
Setting up shipping rates in WooCommerce doesn’t have to be complicated. Whether you’re offering flat rate shipping, free shipping, or real-time carrier rates, WooCommerce gives you the flexibility to tailor your shipping options to meet your business needs.
By following this guide, you can easily configure shipping rates that align with your store’s logistics and provide a smooth checkout experience for your customers. With the right shipping setup, you’ll not only improve customer satisfaction but also enhance the efficiency of your eCommerce operations.

