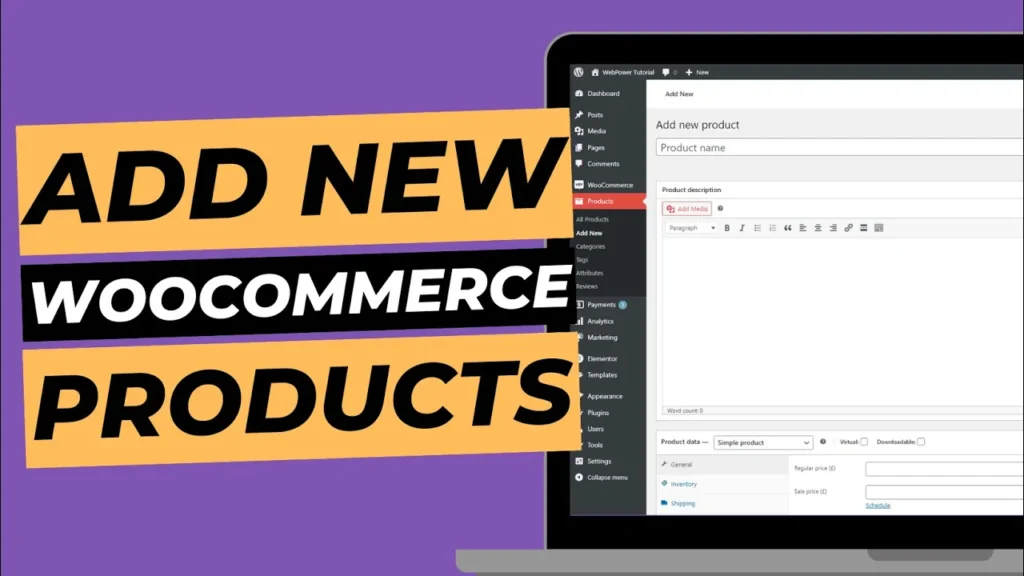
WooCommerce is a highly flexible and customisable eCommerce plugin for WordPress, making it easy to set up and manage your online store. Whether you’re selling physical products, digital downloads, or services, WooCommerce allows you to add products and manage them effectively. In this guide, we’ll walk you through how to add a product in WooCommerce step by step.
Why Choose WooCommerce for Your Online Store?
WooCommerce is widely regarded as one of the best eCommerce platforms because of its flexibility, extensive integration with WordPress, and its vast array of customisation options. It can be tailored to suit any type of business, from small niche shops to large online retailers. WooCommerce is scalable and offers a wide range of features, including inventory management, various shipping options, and easy payment gateway integrations.
Step 1: Log in to Your WordPress Dashboard
The first step to adding a product in WooCommerce is to log in to your WordPress dashboard. Navigate to www.yourdomain.com/wp-admin, and enter your username and password. Once logged in, you’ll have access to your WordPress site’s backend where you can manage your WooCommerce store.
Step 2: Access the WooCommerce Products Section
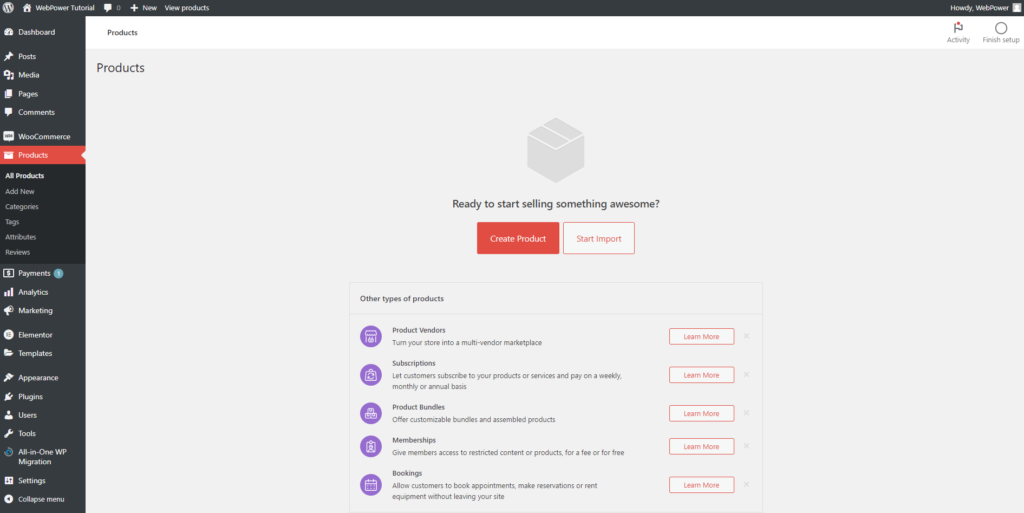
Once you’re in the WordPress dashboard, look for the WooCommerce menu on the left-hand side. Click on WooCommerce and then go to Products. From there, click Add New to create a new product for your store. This will take you to the product editor, where you can start filling out the product details.
Step 3: Enter Product Details
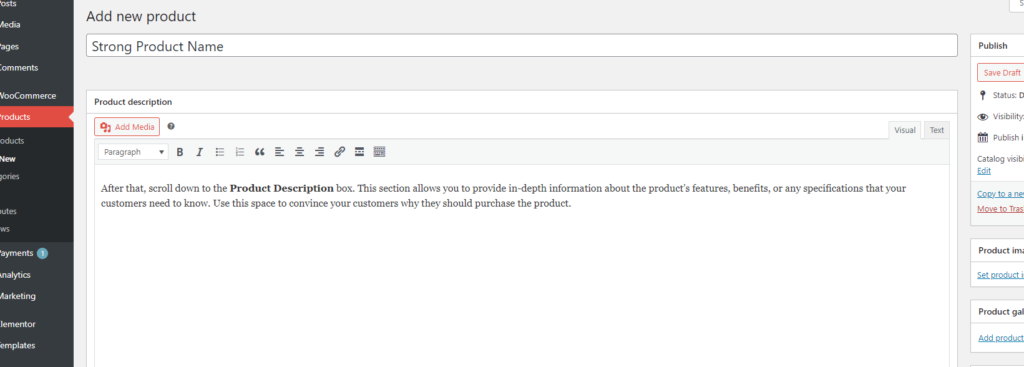
Begin by entering the product’s name in the Product Name field. Make it descriptive and clear, as this is what your customers will see. After that, scroll down to the Product Description box. This section allows you to provide in-depth information about the product’s features, benefits, or any specifications that your customers need to know. Use this space to convince your customers why they should purchase the product.
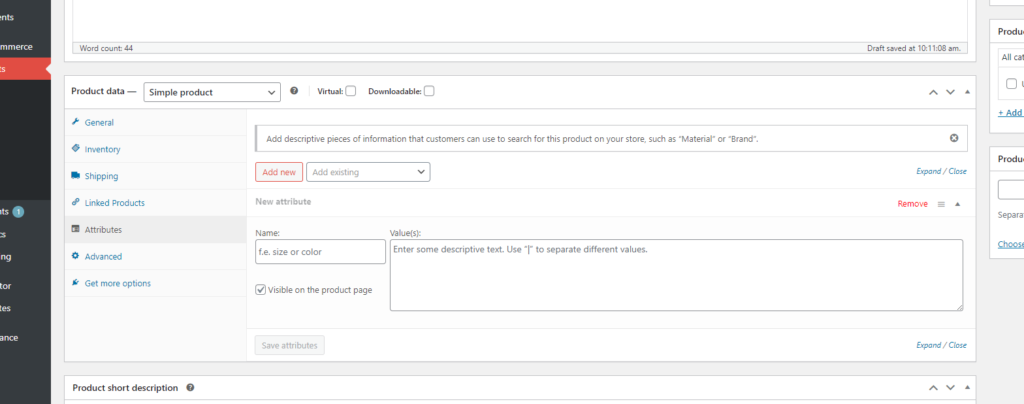
In the Product Data section, you’ll first need to choose the product type. For example, if it’s a standard product with no variations, you would select Simple Product. If you’re selling something with variations, like size or color, choose Variable Product. There are other product types such as grouped products or external products if you’re linking to an external site. For each product, you will also need to input the Regular Price and, if applicable, a Sale Price.
Moving on, in the Inventory section, you can add an SKU (Stock Keeping Unit) if needed and manage stock by toggling the Manage Stock option, which allows you to track inventory automatically. You can also update the stock status to indicate whether the product is in stock, out of stock, or on backorder.
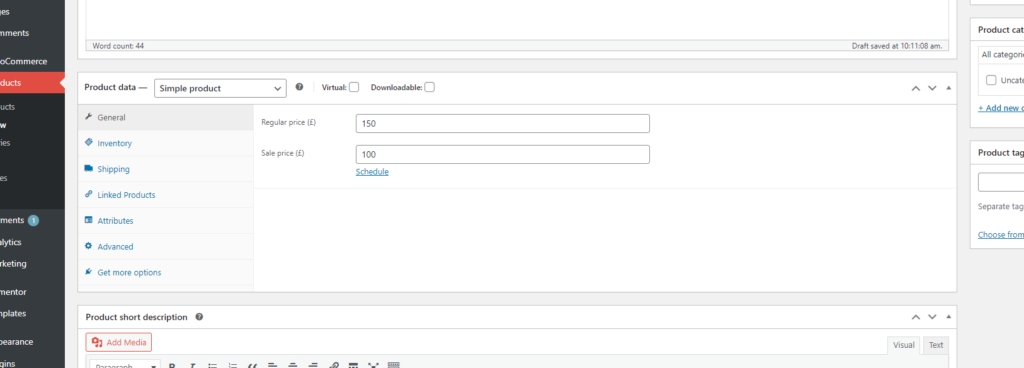
In the Shipping section, input the product’s weight and dimensions (length, width, height), and assign a Shipping Class if you have different shipping rates. For products where customers might be interested in related or complementary items, you can use the Linked Products section to recommend upsells and cross-sells.
In the Attributes section, you can define product attributes such as size, color, or material. For variable products, this is essential as it allows customers to choose from different options. You can also use the Variations section to set prices, stock, and images for each variation.
Step 4: Set Product Images and Gallery
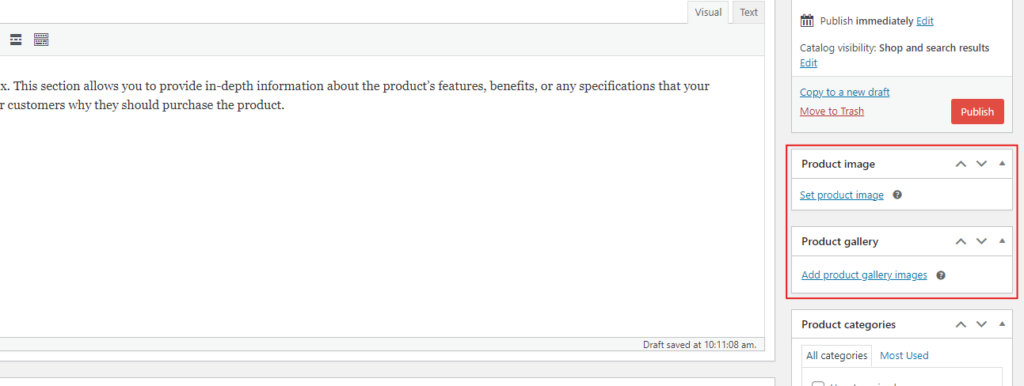
To visually represent your product, scroll down to the Product Image section on the right side of the editor. Here, click Set Product Image to upload or select an image from your media library that best represents the product. This image will be the main product image displayed on the product page. Additionally, you can add more images in the Product Gallery section to showcase different views or variations of the product. Adding a variety of images helps customers better understand the product and increases their likelihood of purchasing.
Step 5: Publish Your Product
Once you’ve filled out all the necessary details, it’s time to publish your product. Before publishing, review all the information you’ve entered to ensure everything is accurate. When you’re ready, simply click the Publish button located on the right-hand side of the editor. Your product will now be live on your WooCommerce store, and customers will be able to view and purchase it.

Additional Tips for Product Management
When adding products to WooCommerce, make sure to upload high-quality images that represent the product well. Clear and professional images make a significant difference in convincing customers to make a purchase. Additionally, always include relevant product information in your descriptions and use keywords to enhance your product’s SEO visibility. Make sure to update stock levels regularly and adjust pricing or sale offers as needed to reflect any changes in your inventory or marketing strategy.
Conclusion
Adding a product to your WooCommerce store is a straightforward process, but it’s important to get the details right. From entering the product name and description to managing inventory and setting prices, each step plays a role in ensuring your product is well-represented and ready for customers to purchase. WooCommerce offers a lot of flexibility in how you manage and present your products, making it a great choice for your eCommerce business. And with WebPower’s reliable hosting services, you can ensure your WooCommerce store runs smoothly and efficiently.
By following these steps, you’ll be able to add products to your WooCommerce store quickly and easily. Keep optimising your store and adding new products to keep customers engaged and coming back for more.

