Keeping your WordPress website fast and efficient is crucial for delivering a great user experience. One of the easiest ways to improve your website’s performance is by clearing the cache. Caching stores temporary data on your website, allowing it to load faster. However, outdated cache files can sometimes cause problems such as not showing recent changes. In this post, we’ll show you how to clear the cache in just one minute using the WP Fastest Cache plugin.
Why Clear Your WordPress Cache?
Clearing the cache on your WordPress site is important for several reasons:
- Website Changes Not Visible: If you’ve recently updated your content, design, or plugins, but can’t see the changes, your site might still be displaying cached files.
- Improved Performance: Clearing cache ensures your site loads the most up-to-date content, keeping it fast and efficient.
- Fixes Errors: Sometimes, old cache files can lead to display errors or issues with functionality. Regular cache clearing can prevent this.
Step 1: Install WP Fastest Cache Plugin
If you haven’t already installed the WP Fastest Cache plugin, follow these simple steps:
- Log in to your WordPress Dashboard: Go to your site’s admin login page (
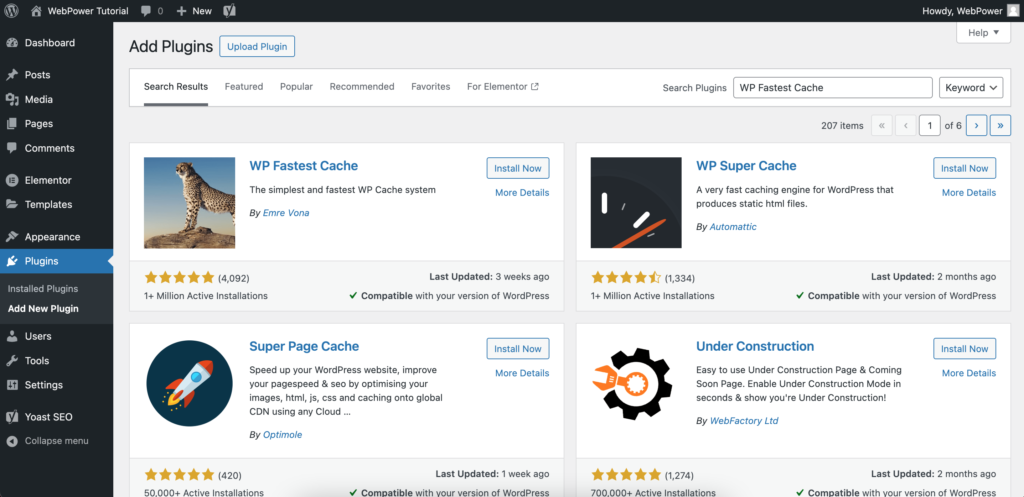
www.yourdomain.com/wp-admin) and enter your credentials. - Navigate to Plugins: In the left-hand menu of your WordPress dashboard, click on “Plugins” and then “Add New.”
- Search for WP Fastest Cache: In the search bar at the top right, type “WP Fastest Cache.” Once you see the plugin, click “Install Now” and then activate it.
Step 2: Clear Cache in 1 Minute
With the WP Fastest Cache plugin installed and activated, you can clear your WordPress cache in just a few clicks. Here’s how:
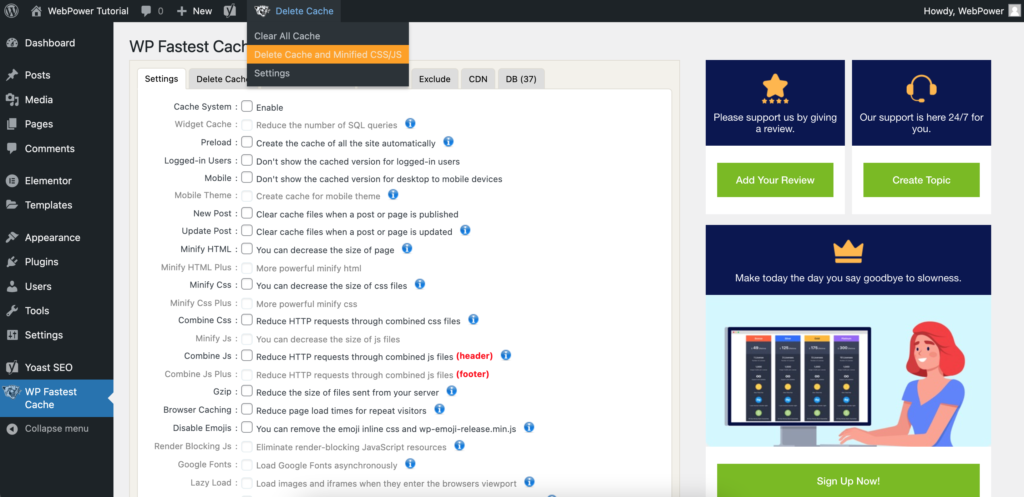
- Access WP Fastest Cache Settings: In the WordPress dashboard, find “WP Fastest Cache” in the left-hand menu and click on it.
- Clear the Cache: In the WP Fastest Cache settings page, you’ll see a large button labeled “Delete Cache.” Simply click this button to clear all cached files on your site.
- Cache Cleared: You should see a confirmation message indicating that the cache has been successfully cleared. Your website is now serving the latest version of your content to visitors.
Step 3: Automate Cache Clearing (Optional)
WP Fastest Cache allows you to set up automated cache clearing, so you don’t have to worry about manually clearing it each time. Here’s how to enable this feature:
- Schedule Automatic Cache Clearing: In the WP Fastest Cache settings, you can enable scheduled cache clearing. Set how often you want the cache to be automatically deleted (e.g., daily or weekly).
- Set Cache Exclusions: If you don’t want certain pages or files to be cleared from the cache, you can add them to the exclusion list.
Conclusion
Clearing your WordPress cache using the WP Fastest Cache plugin is quick, simple, and takes less than a minute. Regularly clearing your cache ensures that your site remains fast and your visitors see the most recent content. With WP Fastest Cache, you also have the option to automate the process, so you never have to worry about old cache files slowing down your site.
If you’re using WebPower hosting, our platform is optimised for fast performance, but using plugins like WP Fastest Cache can provide even more speed and flexibility.

