A well-structured menu is essential for your website’s user experience. It helps visitors navigate your site easily and find important pages. WordPress makes it simple to create and customise menus, allowing you to guide your users to the most relevant sections of your site.
In this guide, we’ll show you how to create a menu in WordPress, add items to it, and customise it for your website.
Why Your Website Needs a Menu
Menus are a crucial part of any website, providing:
- Navigation: A clear menu helps visitors find key pages such as your homepage, blog, contact page, or services.
- Improved User Experience: Good menu organisation makes it easier for users to explore your site, leading to better engagement.
- SEO Benefits: A well-structured menu can improve your site’s SEO by helping search engines index important pages.
Step 1: Log in to Your WordPress Dashboard
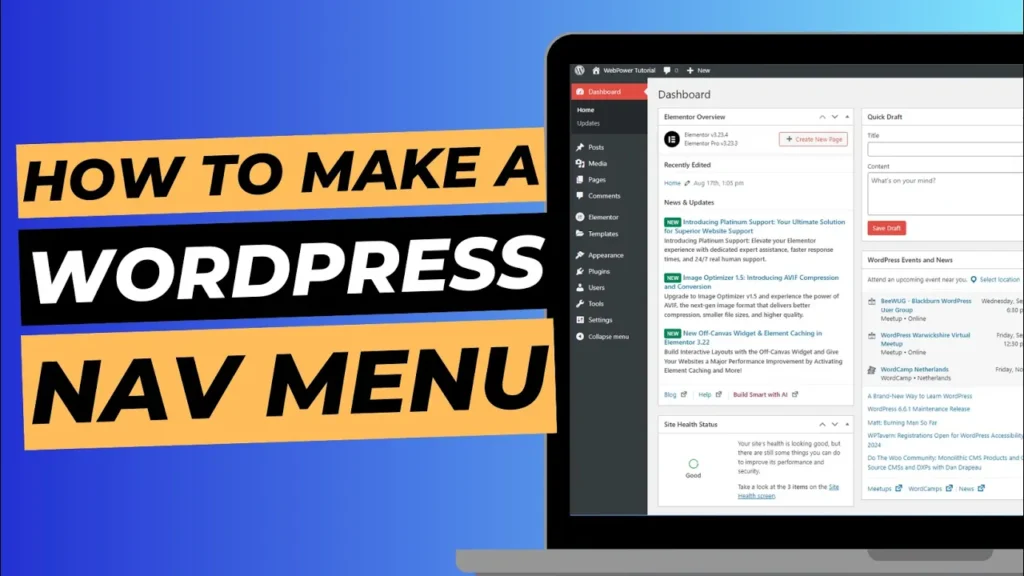
To start creating a menu, you’ll need to access your WordPress dashboard.
How to Log In:
- Go to Your Login Page: Visit
https://yourdomain.com/wp-adminand log in using your username and password. - Access the Dashboard: Once logged in, you’ll land on the WordPress dashboard, where you can manage your site’s settings, content, and menus.
Step 2: Navigate to the Menus Section
To create or edit a menu, you need to head over to the menus section within the dashboard.
How to Find the Menus Section:
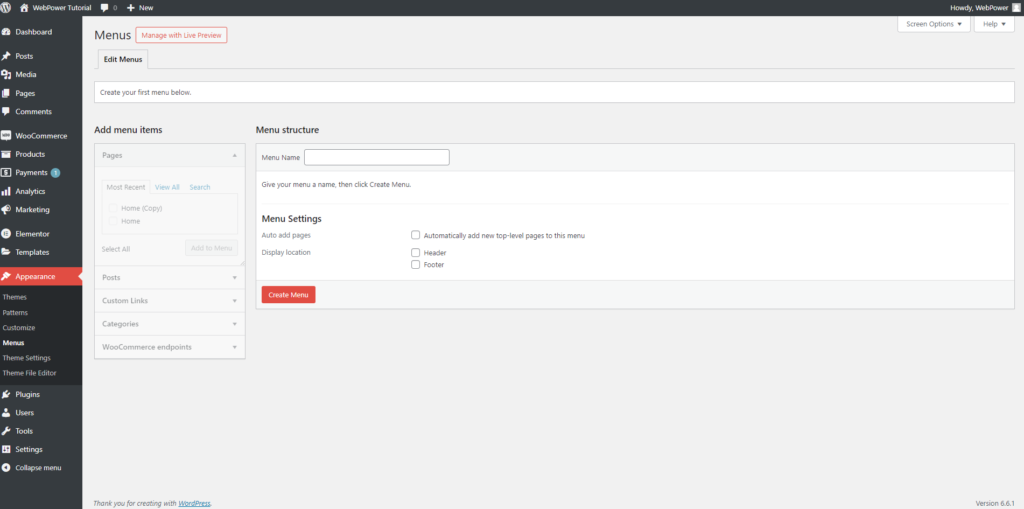
- Go to Appearance > Menus: In the WordPress dashboard, on the left-hand sidebar, click “Appearance,” then select “Menus.”
- Create a New Menu: If you don’t already have a menu, click the “Create a new menu” link. Give your menu a name (such as “Main Menu” or “Header Menu”) and click the “Create Menu” button.
Step 3: Add Pages and Items to Your Menu
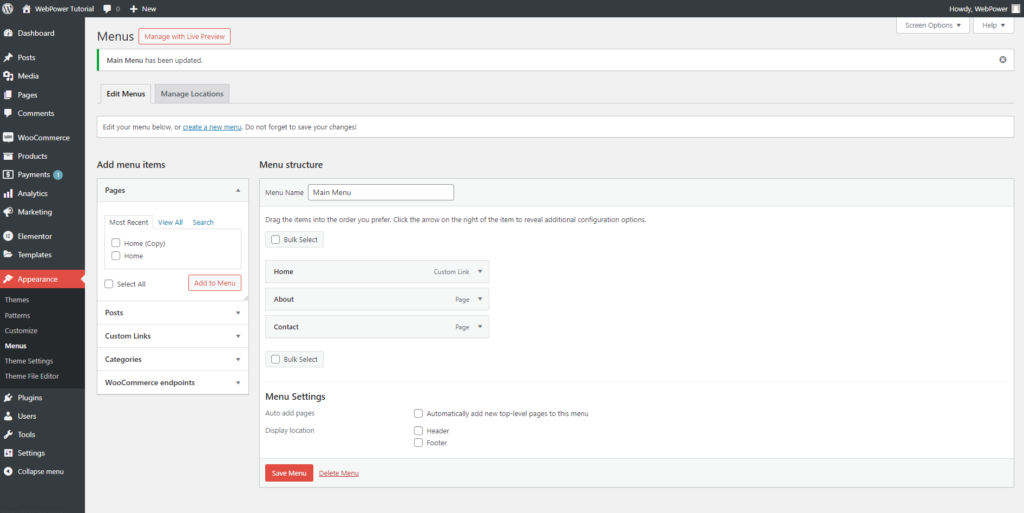
Once your menu is created, you can start adding pages, posts, custom links, and categories to it.
How to Add Items:
- Add Pages: In the “Pages” section, select the pages you want to include in your menu, such as your homepage, about page, and contact page. Click the checkbox next to each page, then click “Add to Menu.”
- Add Custom Links: If you want to link to an external website or a specific URL, you can add a custom link. Simply enter the URL and the link text (e.g., “Blog” or “Shop”), and click “Add to Menu.”
- Add Categories: If you run a blog and want to direct users to specific post categories, you can add them to the menu. In the “Categories” section, check the categories you want to add, and click “Add to Menu.”
Step 4: Organise Menu Items
Once you’ve added all the necessary items, you can rearrange them to create the perfect structure.
How to Organise:
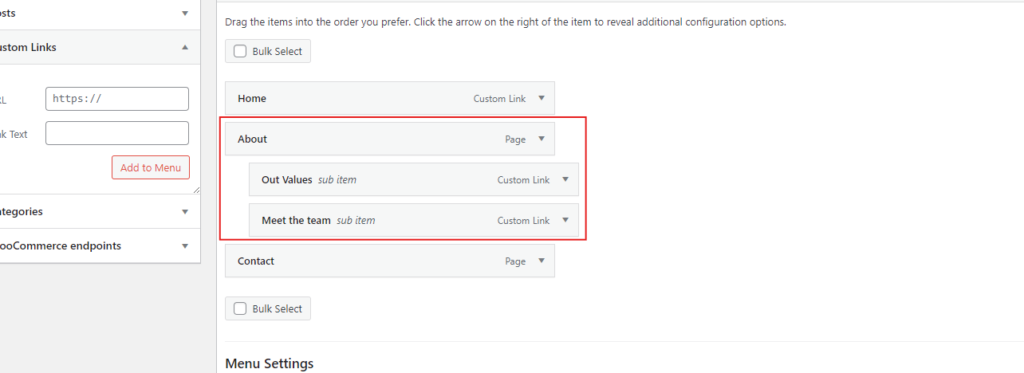
- Drag and Drop: Use the drag-and-drop functionality to rearrange your menu items. Simply click and hold an item, then drag it to the desired position.
- Create Submenus: If you want to create a dropdown menu, drag an item slightly to the right under another item. This will nest it, creating a submenu.
Step 5: Choose the Menu Location
WordPress allows you to display menus in different areas of your site, such as the header, footer, or sidebar. The available locations depend on your theme.
How to Choose a Location:
- Theme Locations: In the “Menu Settings” section below your menu items, you’ll see options to assign your menu to different locations, like the Primary Menu or Footer Menu.
- Select a Location: Check the box next to the location where you want your menu to appear. Most themes use “Primary Menu” for the main navigation at the top of the site.
- Save Your Menu: Once you’ve chosen a location, click the “Save Menu” button to apply the changes.
Step 6: Preview Your Menu
After saving your menu, it’s a good idea to check how it looks on your live site.
How to Preview Your Menu:
- Visit Your Website: Go to your website’s homepage and check the menu to ensure everything is displaying correctly.
- Test Links: Click on the menu items to confirm that they link to the correct pages or categories.
Step 7: Customise Your Menu (Optional)
If you want to further customise your menu, WordPress allows you to add additional CSS or use menu widgets, depending on your theme.
Additional Customisation Options:
- Use a Menu Widget: Some themes allow you to add menus to your sidebar or footer via widgets. Go to “Appearance > Widgets” to explore this option.
- Customise with CSS: Advanced users can customise menu styles by adding custom CSS in the theme customiser or theme editor.
Conclusion
Creating a menu in WordPress is simple and allows you to improve your site’s navigation and user experience. By following these steps, you can easily add pages, posts, and custom links to your menu, organise it in a way that makes sense for your visitors, and display it in the best location on your site. Whether you’re managing a blog, business site, or online store, a well-structured menu ensures visitors can easily find what they’re looking for.
If you need help with setting up your WordPress site or have any questions, don’t hesitate to reach out to WebPower’s support team for assistance!

