Securing your WordPress website with an SSL certificate is crucial for protecting your data and ensuring trust with your visitors. An SSL (Secure Sockets Layer) certificate encrypts the data transmitted between your website and your users, safeguarding sensitive information like login credentials, payment details, and personal data. Additionally, having an SSL certificate is a significant ranking factor for search engines like Google, making it essential for SEO.
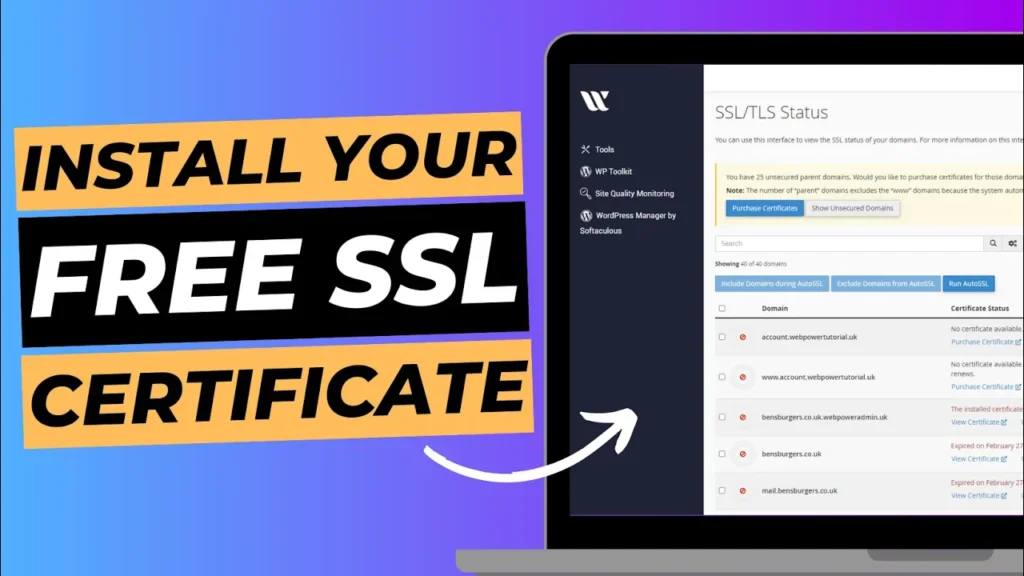
At WebPower, we offer free SSL certificates with our hosting plans. If you’ve just purchased your hosting with WebPower or need to install an SSL certificate on your existing WordPress site, this guide will walk you through the process of enabling SSL via the AutoSSL function in cPanel.
Why SSL Is Important for Your Website
Before we dive into the installation process, it’s important to understand why SSL is vital:
- Data Security: SSL encrypts data, protecting it from hackers and unauthorised access.
- SEO Benefits: Google prioritises secure sites, so having an SSL certificate can improve your search engine rankings.
- Trust and Credibility: Websites with SSL display a padlock icon in the browser’s address bar, reassuring visitors that your site is secure.
- Compliance: SSL is often a requirement for meeting industry standards and regulations, especially for e-commerce sites.
Now that you know why SSL is important, let’s get started with installing it on your WordPress site.
Step 1: Accessing cPanel via WebPower
To install an SSL certificate on your WordPress site, you first need to access your cPanel through your WebPower hosting account.
How to Access cPanel
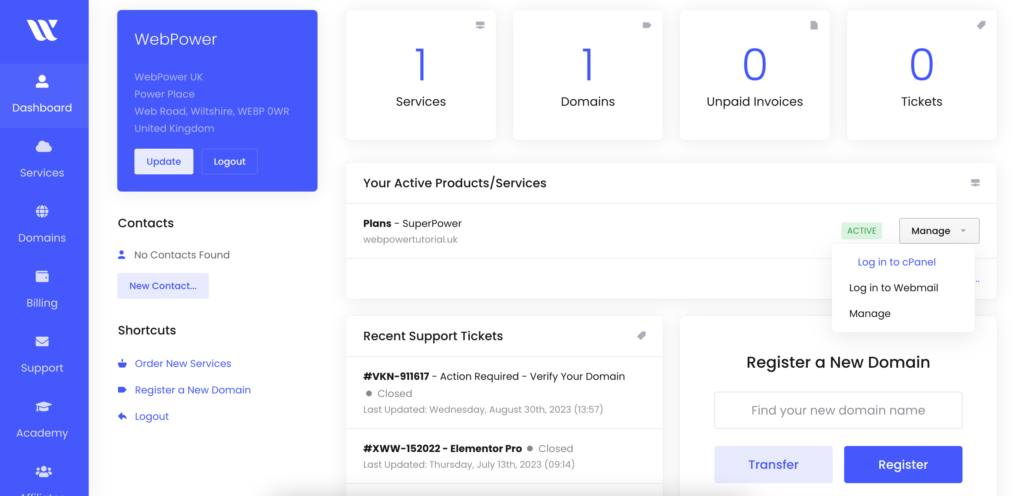
- Log in to Your WebPower Account: Start by visiting the WebPower website and logging into your account with your username and password.
- Navigate to cPanel: Once logged in, find the cPanel link in your dashboard and click it to access the cPanel interface.
Step 2: Running AutoSSL in cPanel
WebPower provides free SSL certificates that can be automatically installed using the AutoSSL feature in cPanel. This tool simplifies the process, ensuring that your website is secure with just a few clicks.
How to Run AutoSSL
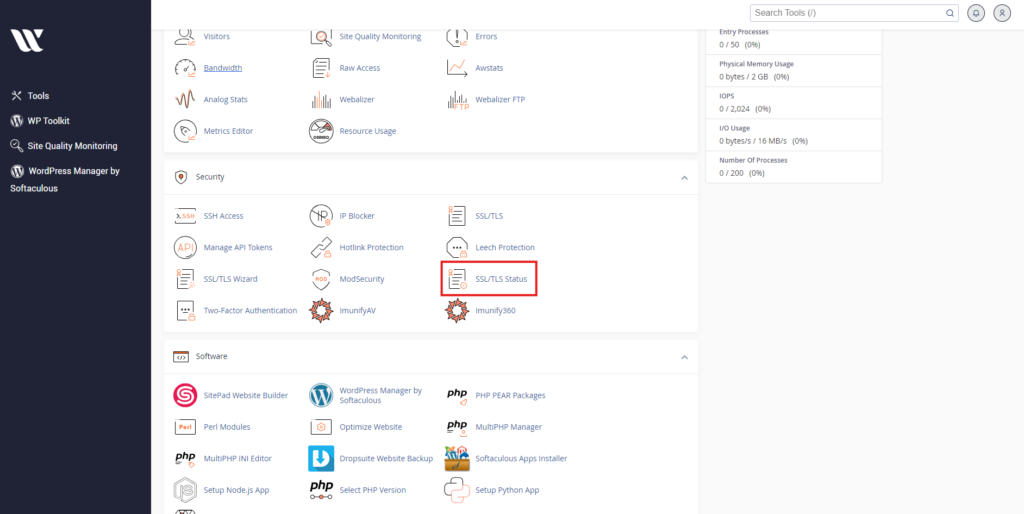
- Locate the SSL/TLS Status Option: In cPanel, scroll down to the ‘Security’ section. Here, you’ll find an option labeled ‘SSL/TLS Status’. Click on it to open the SSL management tool.
- Select Your Domain: In the SSL/TLS Status page, you’ll see a list of domains associated with your hosting account. Find your WordPress domain and ensure that it’s selected. If you have multiple domains, you can select all that you wish to secure with SSL.
- Run AutoSSL: Once your domain is selected, look for the ‘Run AutoSSL’ button at the top or bottom of the page and click it. cPanel will now begin the process of generating and installing the SSL certificate for your domain.
- Wait for Completion: The AutoSSL process typically takes a few minutes. During this time, cPanel will automatically validate your domain and install the SSL certificate. Once completed, you’ll see a confirmation message indicating that SSL has been successfully installed.
Step 3: Configuring WordPress to Use SSL
After installing the SSL certificate, the next step is to configure your WordPress website to use HTTPS instead of HTTP. This ensures that all traffic to and from your site is securely encrypted.
Changing Your WordPress URL to HTTPS
- Log in to Your WordPress Dashboard: Visit your WordPress site and log in with your admin credentials.
- Go to General Settings: In the WordPress dashboard, navigate to Settings > General.
- Update WordPress and Site URLs: In the General Settings page, you’ll see two fields labeled ‘WordPress Address (URL)’ and ‘Site Address (URL)’. Update both URLs to use
https://instead ofhttp://(e.g.,https://yourdomain.com). - Save Changes: After updating the URLs, scroll down and click the ‘Save Changes’ button to apply the settings.

Forcing HTTPS with a Plugin
To ensure that all traffic is redirected to the secure HTTPS version of your site, you can use a plugin like Really Simple SSL.
- Install and Activate the Plugin: In your WordPress dashboard, go to Plugins > Add New and search for ‘Really Simple SSL’. Install and activate the plugin.
- Enable SSL: Once activated, the plugin will automatically detect your SSL certificate and configure your site to use HTTPS. Follow any on-screen instructions to complete the setup.

Step 4: Testing Your SSL Installation
After configuring your site to use HTTPS, it’s important to test your SSL installation to ensure everything is working correctly.
How to Test Your SSL
- Visit Your Website: Open a web browser and navigate to your website using
https://yourdomain.com. Check the address bar to ensure the padlock icon is displayed, indicating that the connection is secure. - Use Online SSL Tools: There are various online tools available, such as SSL Checker or Why No Padlock, that can scan your site and verify that the SSL certificate is correctly installed and configured.
- Check for Mixed Content: If some elements on your site are still being loaded over HTTP instead of HTTPS, this can cause issues. The Really Simple SSL plugin can help fix these, or you can manually update links in your theme and content.
Step 5: Renewing Your SSL Certificate
WebPower’s free SSL certificates typically renew automatically. However, it’s good practice to periodically check your SSL status to ensure everything remains up to date.
Checking SSL Status
- Return to SSL/TLS Status in cPanel: Periodically, revisit the ‘SSL/TLS Status’ section in cPanel to confirm that your SSL certificate is active and up to date.
- Monitor Expiry Dates: The SSL/TLS Status page will show you the expiry date of your SSL certificate. If AutoSSL does not automatically renew your certificate, you can manually run AutoSSL again to renew it.

Conclusion
Installing an SSL certificate on your WordPress website with WebPower is a straightforward process, thanks to the AutoSSL feature in cPanel. With just a few clicks, you can secure your website, protect your visitors’ data, and enhance your site’s credibility and SEO.
Remember, SSL is not a one-time task but an ongoing process that ensures your site remains secure and trusted. Whether you’re launching a new site or securing an existing one, WebPower’s free SSL certificates provide an easy and cost-effective way to protect your online presence.
If you have any questions or encounter issues during the installation process, WebPower’s support team is always available to assist you. Secure your WordPress site today and give your visitors the peace of mind they deserve!

