Creating a professional email account using your domain is a crucial step for businesses and individuals who want to present a polished image. With WebPower, setting up an email account in cPanel is a straightforward process. In this guide, we’ll walk you through each step so that you can create an email address that matches your domain name in just a few minutes.
Why Create a Custom Email Account?
Before diving into the setup process, let’s quickly look at why having a custom email account is beneficial:
- Professionalism: An email address with your domain name (e.g., yourname@webpower.uk) looks more professional than using a generic email service.
- Branding: Every time you send an email, you’re reinforcing your brand by including your domain name.
- Trust: Customers are more likely to trust and engage with emails sent from a custom domain than from a free email provider.
Now, let’s get started with setting up your email account in cPanel through WebPower.
Step 1: Accessing WebPower’s cPanel
The first step to creating an email account is accessing cPanel, your control panel for managing your hosting account.
How to Access cPanel
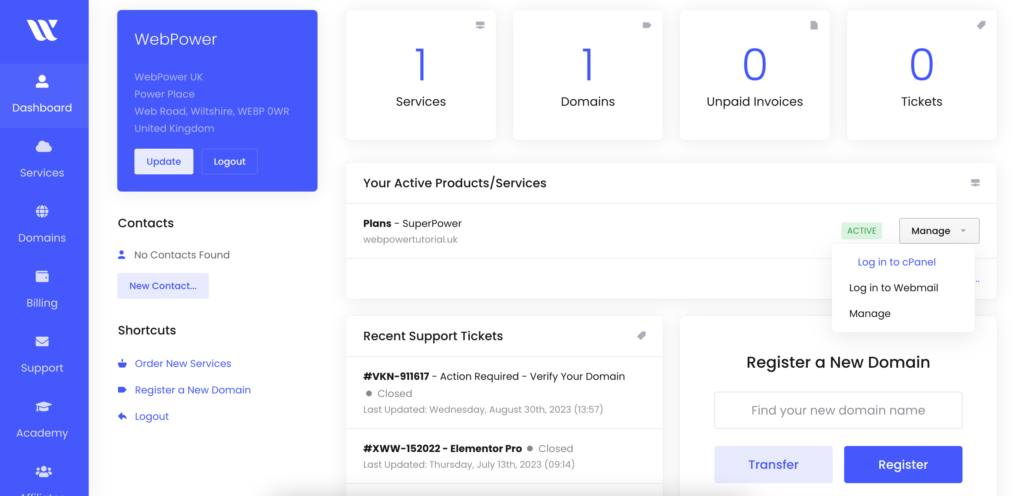
- Log in to Your WebPower Account: Go to the WebPower website and log in to your hosting account.
- Find cPanel: After logging in, you’ll see a link to cPanel in your account dashboard.
- Click on cPanel: This link will take you to the cPanel dashboard, where you can manage various aspects of your hosting account.
Step 2: Navigating to the Email Accounts Section
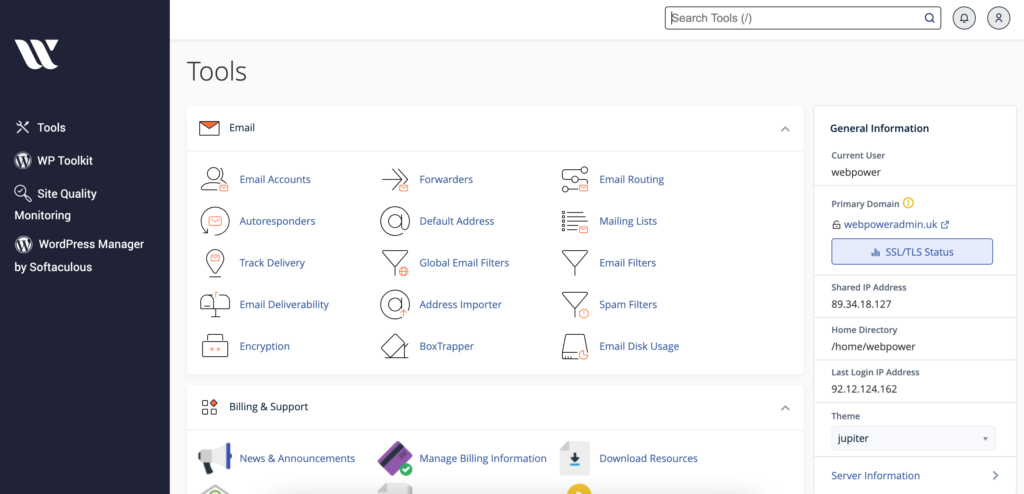
Once you’re in cPanel, you’ll find that it offers a variety of tools and features. To create an email account, you’ll need to locate the Email Accounts section.
Finding the Email Accounts Section
- Search for ‘Email’: In the cPanel dashboard, use the search bar at the top to type “Email”. This will help you quickly locate the Email Accounts section.
- Click on ‘Email Accounts’: Once you find it, click on the ‘Email Accounts’ link to open the email management interface.
Step 3: Creating a New Email Account
Now that you’re in the Email Accounts section, it’s time to create your new email address.
Step-by-Step Process
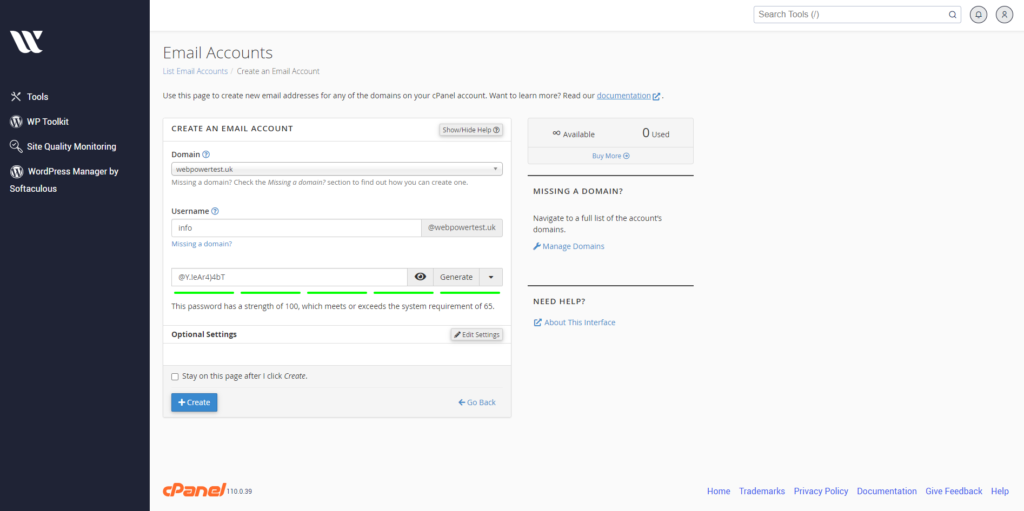
- Click on ‘Create’: Look for a button labeled ‘Create’ and click on it to start setting up your new email account.
- Enter Your Email Address: Enter the part of the email address you want before the “@” symbol (e.g., “info” in info@webpower.uk). Create a strong password for your email account. It’s important to use a secure password to protect your account from unauthorised access.
- Set the Storage Space: Decide how much storage space you want to allocate to this email account. The default setting is usually sufficient, but you can adjust it based on your needs.
- Click ‘Create’: After filling in all the necessary information, click the ‘Create’ button to finalise your new email account.
Step 4: Accessing Your New Email Account
Once your email account is created, you can access it through Webmail or configure it with an email client like Outlook or Thunderbird.
Accessing Email via Webmail
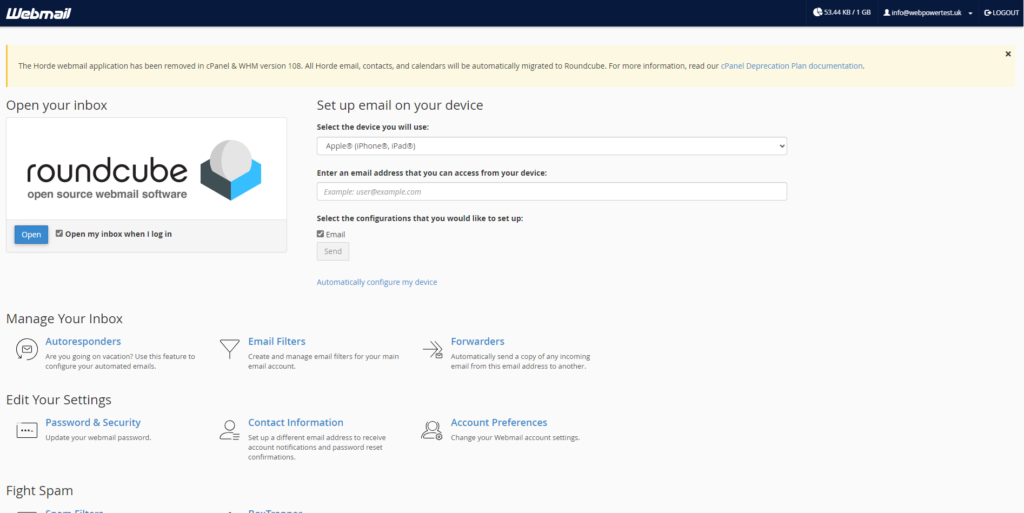
- Go to Webmail: In the cPanel Email Accounts section, you’ll see a list of your email accounts. Next to the email address you just created, click on ‘Check Email’ to access Webmail.
- Choose a Webmail Application: WebPower offers several Webmail applications (e.g., Roundcube, Horde). Choose the one you prefer to use.
- Start Using Your Email: Once inside Webmail, you can start sending and receiving emails from your new address.
Configuring Email with an Email Client
If you prefer to use an email client like Outlook, Apple Mail, or Thunderbird, you’ll need to configure the account settings.
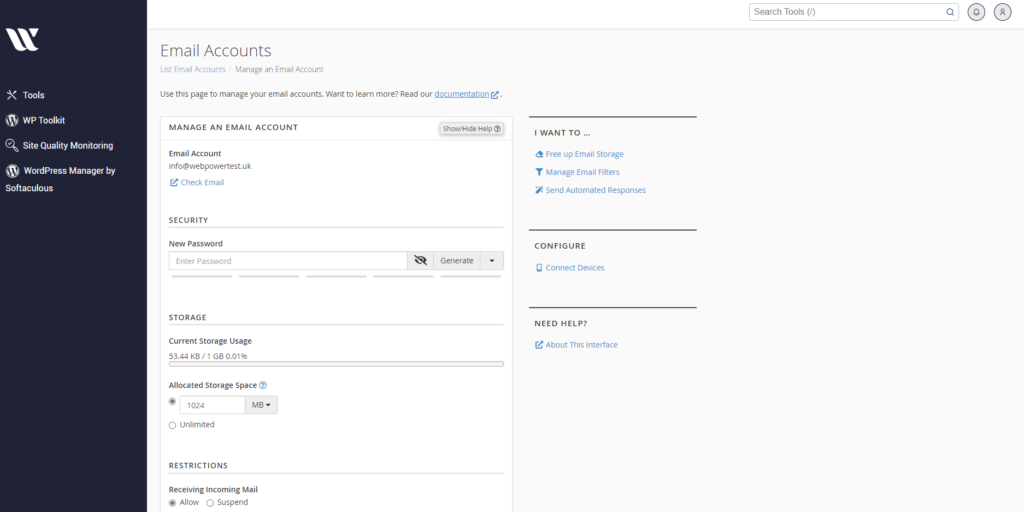
- Click on ‘Connect Devices’: In cPanel’s Email Accounts section, find the email address you want to configure and click ‘Connect Devices’. This will provide you with the necessary settings.
- Follow the Configuration Instructions: Use the settings provided (incoming and outgoing server details) to configure your email client. Detailed instructions are usually available for popular clients.
Step 5: Managing Your Email Account
Once your email account is set up, there are a few additional management tasks you may want to consider.
Managing Email Quotas
To ensure you don’t run out of space, monitor the storage quota for each email account. You can adjust quotas anytime by returning to the Email Accounts section in cPanel.
Setting Up Email Forwarders
If you want to forward emails from this account to another email address, cPanel makes it easy to set up email forwarders. This can be useful if you manage multiple email addresses.
Setting Up Autoresponders
If you’re going to be out of the office, you can set up an autoresponder to automatically reply to incoming emails with a predefined message. This feature is handy for letting people know when you’ll be back or providing alternative contact details.
Conclusion
Creating an email account in cPanel through WebPower is a simple process that gives you a professional edge with a custom email address. By following the steps outlined in this guide, you can quickly set up and manage your email accounts with ease.
Whether you’re a business looking to enhance your brand or an individual wanting a personalised email address, WebPower’s cPanel offers all the tools you need to get started. If you have any questions or need further assistance, WebPower’s support team is always ready to help.
By setting up your email accounts through WebPower, you ensure that your communication is both professional and secure, giving you the confidence to connect with your audience effectively.


