Backing up your WordPress website is one of the most crucial tasks you can perform to protect your data. Whether it’s a technical glitch, a hacking attempt, or a human error, having a recent backup ensures that you can restore your site quickly without losing valuable content. With WebPower’s hosting services, using Softaculous to backup your WordPress website is incredibly straightforward and can be done in just two minutes. This guide will walk you through the process step by step.
Why Regular Backups Are Essential
Before we dive into the quick backup process, let’s discuss why it’s vital to regularly back up your WordPress site:
- Protection Against Data Loss: Mistakes happen, and without a backup, you risk losing all your website content.
- Security: In the event of a hack or malware infection, a backup allows you to restore your site to a previous, clean state.
- Peace of Mind: Knowing that you have a backup provides reassurance that your site’s data is safe.
Now that you understand the importance of regular backups, let’s get started with the process.
Step 1: Accessing WebPower’s cPanel
To begin, you need to log in to your WebPower hosting account and access cPanel, where you’ll find all the tools you need to manage your website.
How to Access cPanel
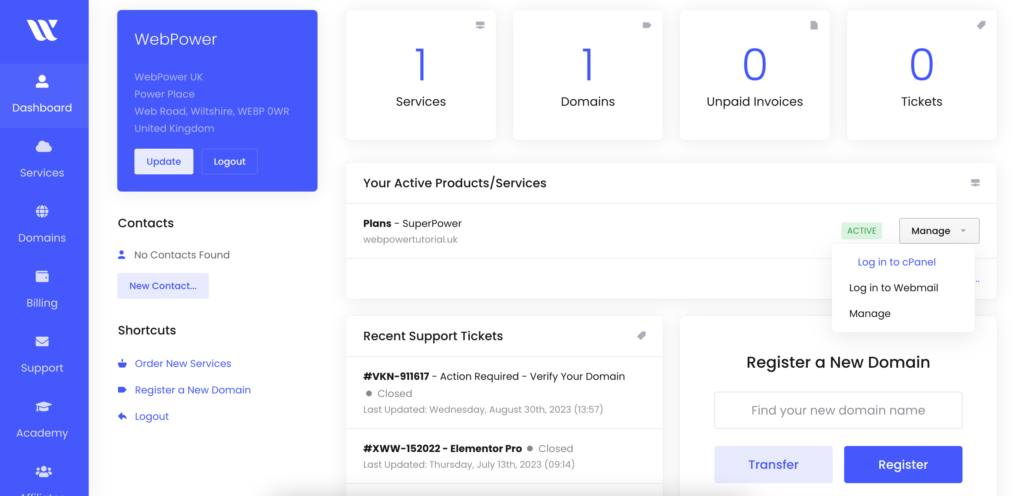
- Log in to Your WebPower Account: Visit the WebPower website and log in with your credentials.
- Navigate to cPanel: Once logged in, locate the cPanel link in your dashboard and click it to open the cPanel interface.
Step 2: Locate Softaculous in cPanel
Softaculous is an application installer within cPanel that also includes a powerful backup tool. You’ll use this tool to quickly backup your WordPress site.
Finding Softaculous
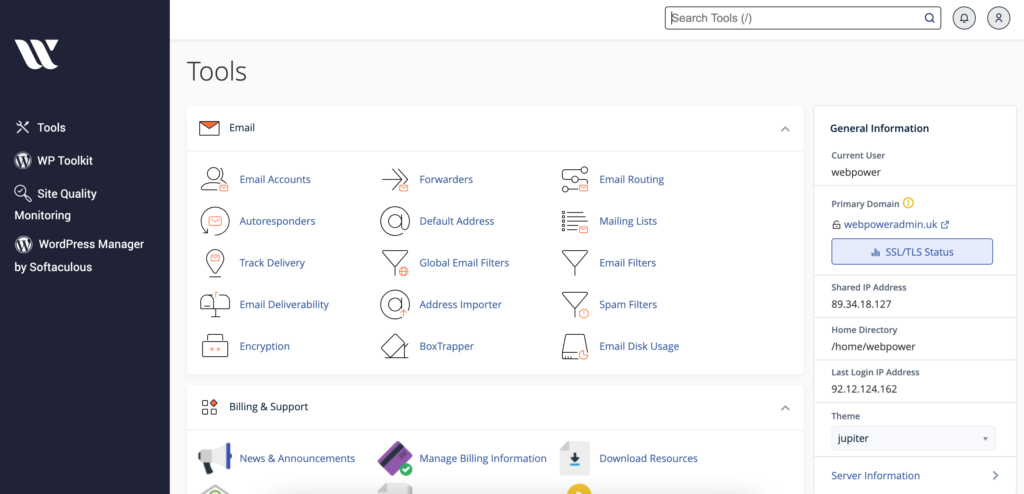
- Search for Softaculous: In the cPanel dashboard, use the search bar at the top of the page and type “Softaculous” to find the app.
- Open Softaculous: Click on the Softaculous icon to access the app’s main dashboard.
Step 3: Selecting Your WordPress Installation
Once inside Softaculous, you’ll need to select the WordPress installation that you want to back up.
Step-by-Step Process
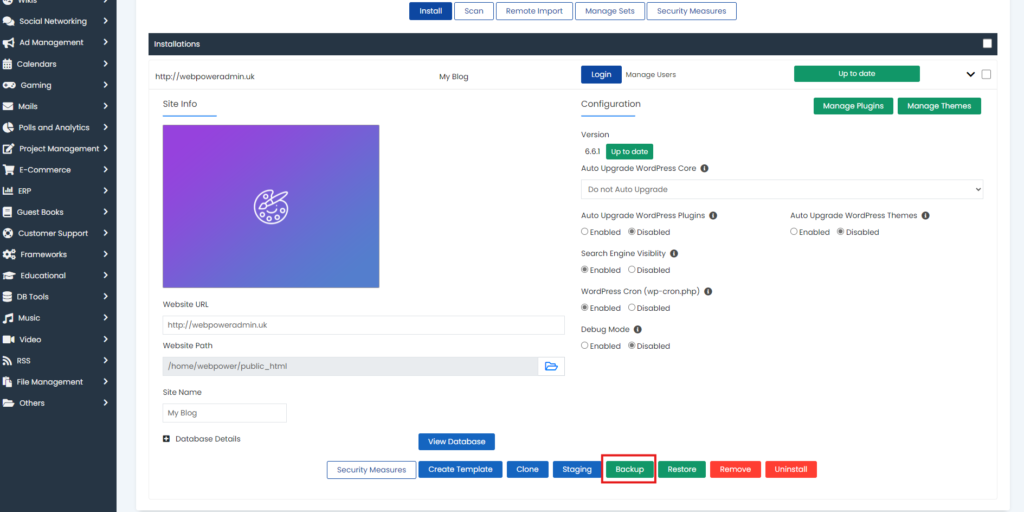
- Go to ‘Installations’: In the Softaculous dashboard, look for an icon or menu item labeled ‘Installations’ or ‘All Installations’. This section lists all the scripts and apps installed on your domain.
- Find Your WordPress Site: Locate the WordPress installation you wish to back up. If you have multiple installations, ensure you’re selecting the correct one.
- Click the Backup Icon: Next to your WordPress installation, you’ll see several action icons. Click on the one labeled ‘Backup’ to initiate the backup process.
Step 4: Backing Up Your WordPress Website
This step is where the magic happens. Softaculous will take care of the entire backup process for you, requiring just a few clicks.
Initiating the Backup
- Confirm the Backup: After clicking the ‘Backup’ icon, Softaculous will ask you to confirm that you want to proceed. It may also give you the option to include/exclude certain files or databases, though the default settings are usually sufficient for most users.
- Start the Backup: Click on ‘Backup Installation’ or a similar button to start the process. Softaculous will now begin creating a full backup of your WordPress site, including the database and all files.
- Wait for Completion: The backup process usually takes just a couple of minutes, depending on the size of your website. Softaculous will notify you once the backup is complete.

Step 5: Downloading and Storing Your Backup
After Softaculous has created the backup, it’s good practice to download it to your local computer or store it in a secure location.
Accessing Your Backup
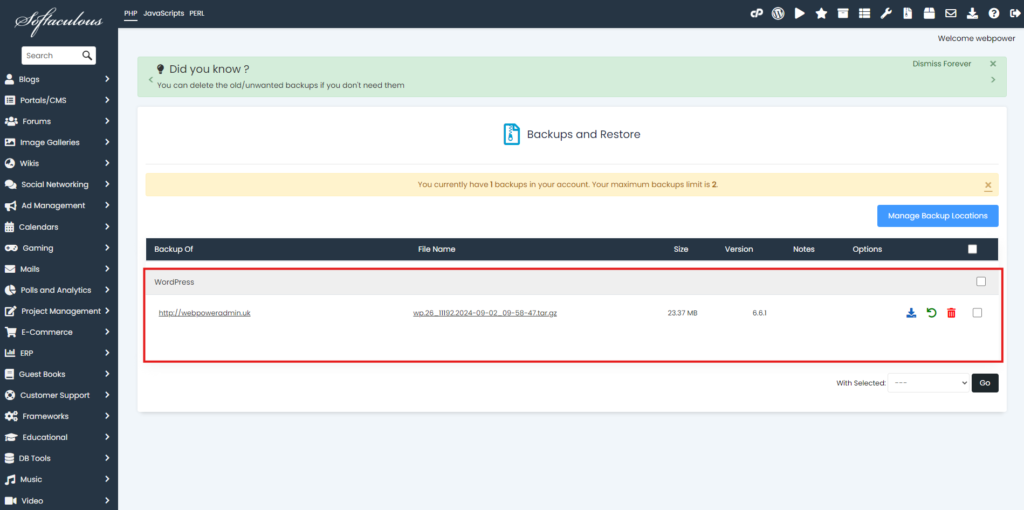
- View Backup Files: In the same ‘Installations’ section where you initiated the backup, you’ll now see an entry for the backup you just created. Click on the ‘View Backup’ or ‘Download’ link.
- Download the Backup: Save the backup file to your computer or an external storage device. This ensures that even if your hosting account encounters issues, you still have a secure copy of your website.
Optional: Automating Backups
WebPower’s hosting services allow you to set up automated backups using Softaculous. This feature can be especially useful if you frequently update your site. To automate backups, go to the ‘Installations’ section in Softaculous and enable scheduled backups, choosing the frequency that best suits your needs.
Conclusion
Backing up your WordPress website with WebPower using Softaculous is a fast and efficient process that can be completed in just two minutes. Regular backups are essential for protecting your site from data loss, security breaches, and unexpected errors. By following this guide, you’ve taken an important step in safeguarding your online presence.
Remember, it’s always better to have a backup and not need it than to need one and not have it. If you ever encounter any issues or have questions about the backup process, WebPower’s support team is available to assist you.
Keep your website secure and ensure peace of mind by making backups a regular part of your website management routine.


